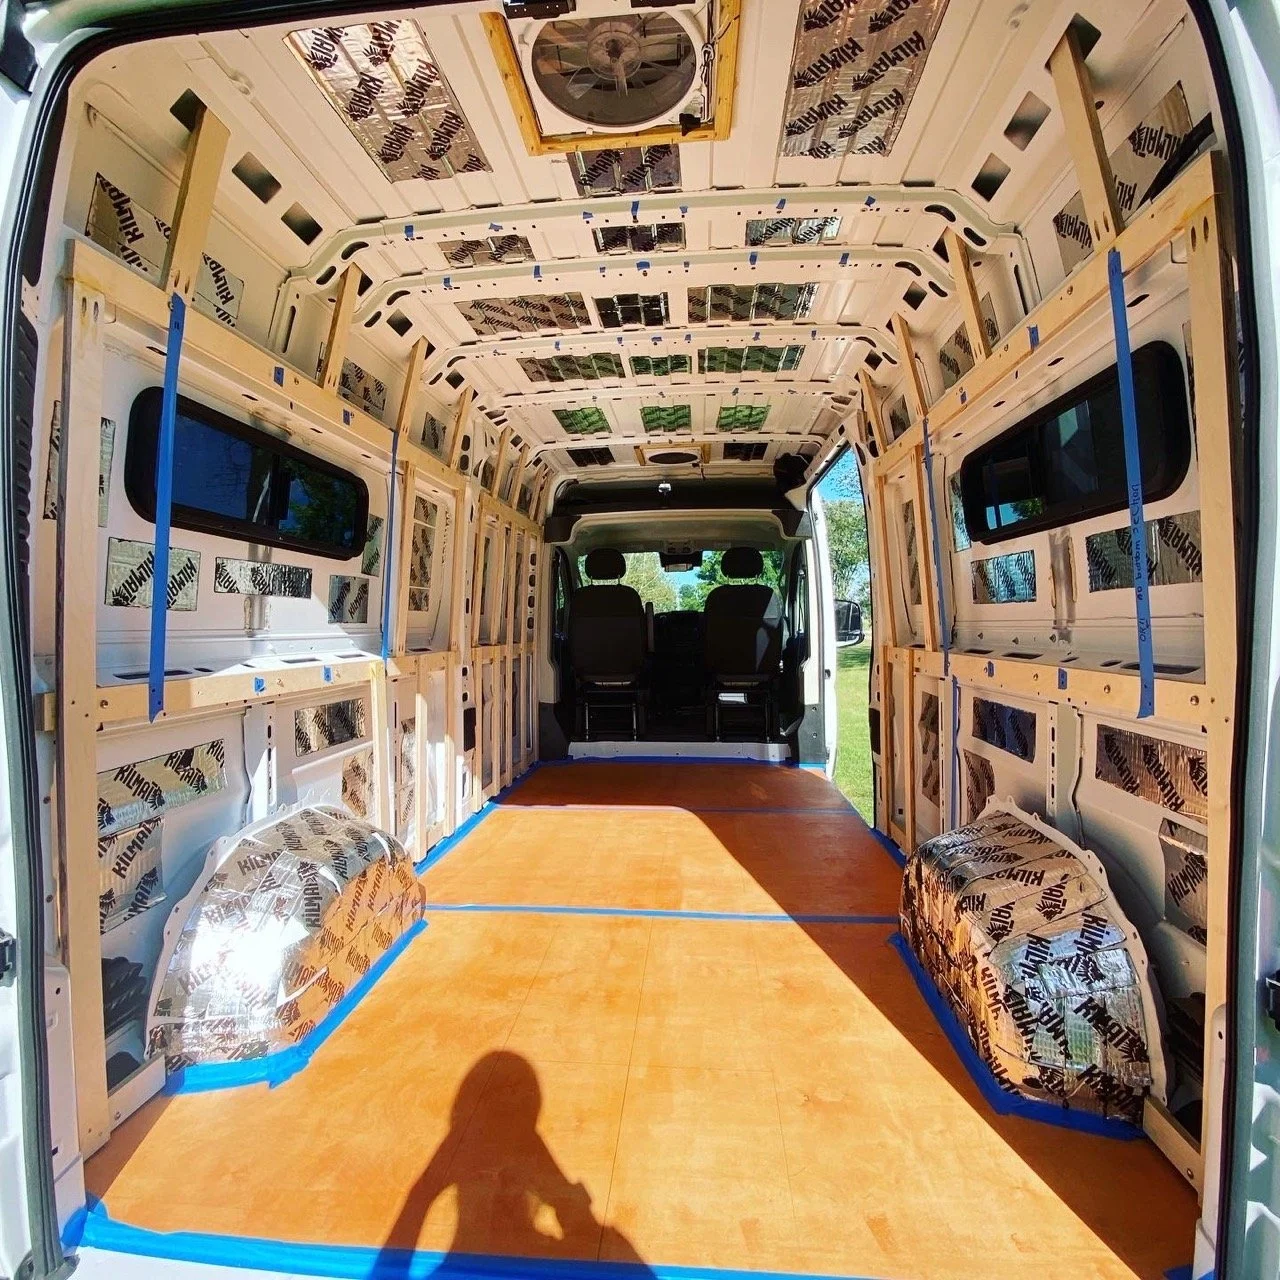
Framing
-
3/4” Baltic Birch Plywood cut 2.5” wide
1/4-20” & 10-32 Plus Nuts, Machine Screws & Washers
1 1/4” Kreg Pocket Hole Screws
Titebond 2 Premium Wood Glue
-
To easily attach the walls, ceiling and cabinetry in place
-
Embrace the curve of your van, but try to make the lower section as squared as you can, otherwise you can stencil your cabinetry to the wall
Use plusnuts in the van rib holes
I have more confidence in plus nuts then rivets and self-tapping screws
Avoid drilling into the metal of your van, like self-taping screws, to prevent rust
Break the walls into three sections: the lower section, middle section and upper section
No need to use anything thicker than 3/4”
-
For the ceiling furring strips, I used 1/2” baltic birch
Save on head space
Easier to flex to the curve
No reason for anything thicker
-
No framing
Stencil all your cabinetry to the van curve and attach directly to the van
Only add furring strips where needed for your layout
*I think it’s easier to have a foundation that you can screw into at any point in the build - framing gives you a foundation to build off of moving forward
-
I’d do my framing the same exact way with the same materials and technique.