Bug Screens
-
Brand:The Bug Wall
Products: Bug Wall bug screens and Chill CurtainsInstalled At:
Sliding door entrance
Rear door entrance
-
Keep bugs out of the van – For the first three years, I dealt with flies and bugs coming in whenever I wanted to keep the doors open for fresh air and enjoy the views. It was miserable. Bug screens make it possible to leave the doors open without letting insects inside.
Additional insulation in the winter – Chill Curtains add an extra layer over the doors, helping reduce drafts and keep more heat inside during colder months.
-
Remove the door gasket to tuck the fabric behind it and secure it with the metal clips provided
Don’t pull the screen too tight side to side or the magnets and zipper may not close fully
Stop the length right at the floor so the magnets close properly and the zipper doesn’t interfere with the door track
-
Made specifically for your van’s make and model for a precise fit
Screens available for both the sliding door and rear doors
Choose your opening style: zipper or walk-through magnets that close behind you
I chose the magnetic version and love it — much easier than opening and closing a zipper every time you enter or exit
Customize the sliding door opening location to fit your layout — centered, forward, or toward the back
Screens can be fully removed when bugs aren’t an issue
Can also be rolled up and clipped in place when not in use
Zippers along the top and sides allow the screens to roll up neatly
Bug screens can be swapped for Chill Curtains in winter to help keep warm air in and cold air out when doors are open
-
Cheaper option
Looser fit that obstructs the view outside the van
Attaches magnetically to the door frame
Very long, so be mindful when opening and closing the door to avoid snagging it
Non-permanent solution that requires setup and teardown
Not as high quality as The Bug Wall
-
I LOVE these bug screens!!! I spent a lot of time researching the best option and I’m confident this is the best on the market—hands down. They make it incredibly easy to enter and exit the van with the magnetic opening, and they’re simple to roll up, remove, or swap out for the Chill Curtains. The quality is extremely high, and the installation is straightforward.

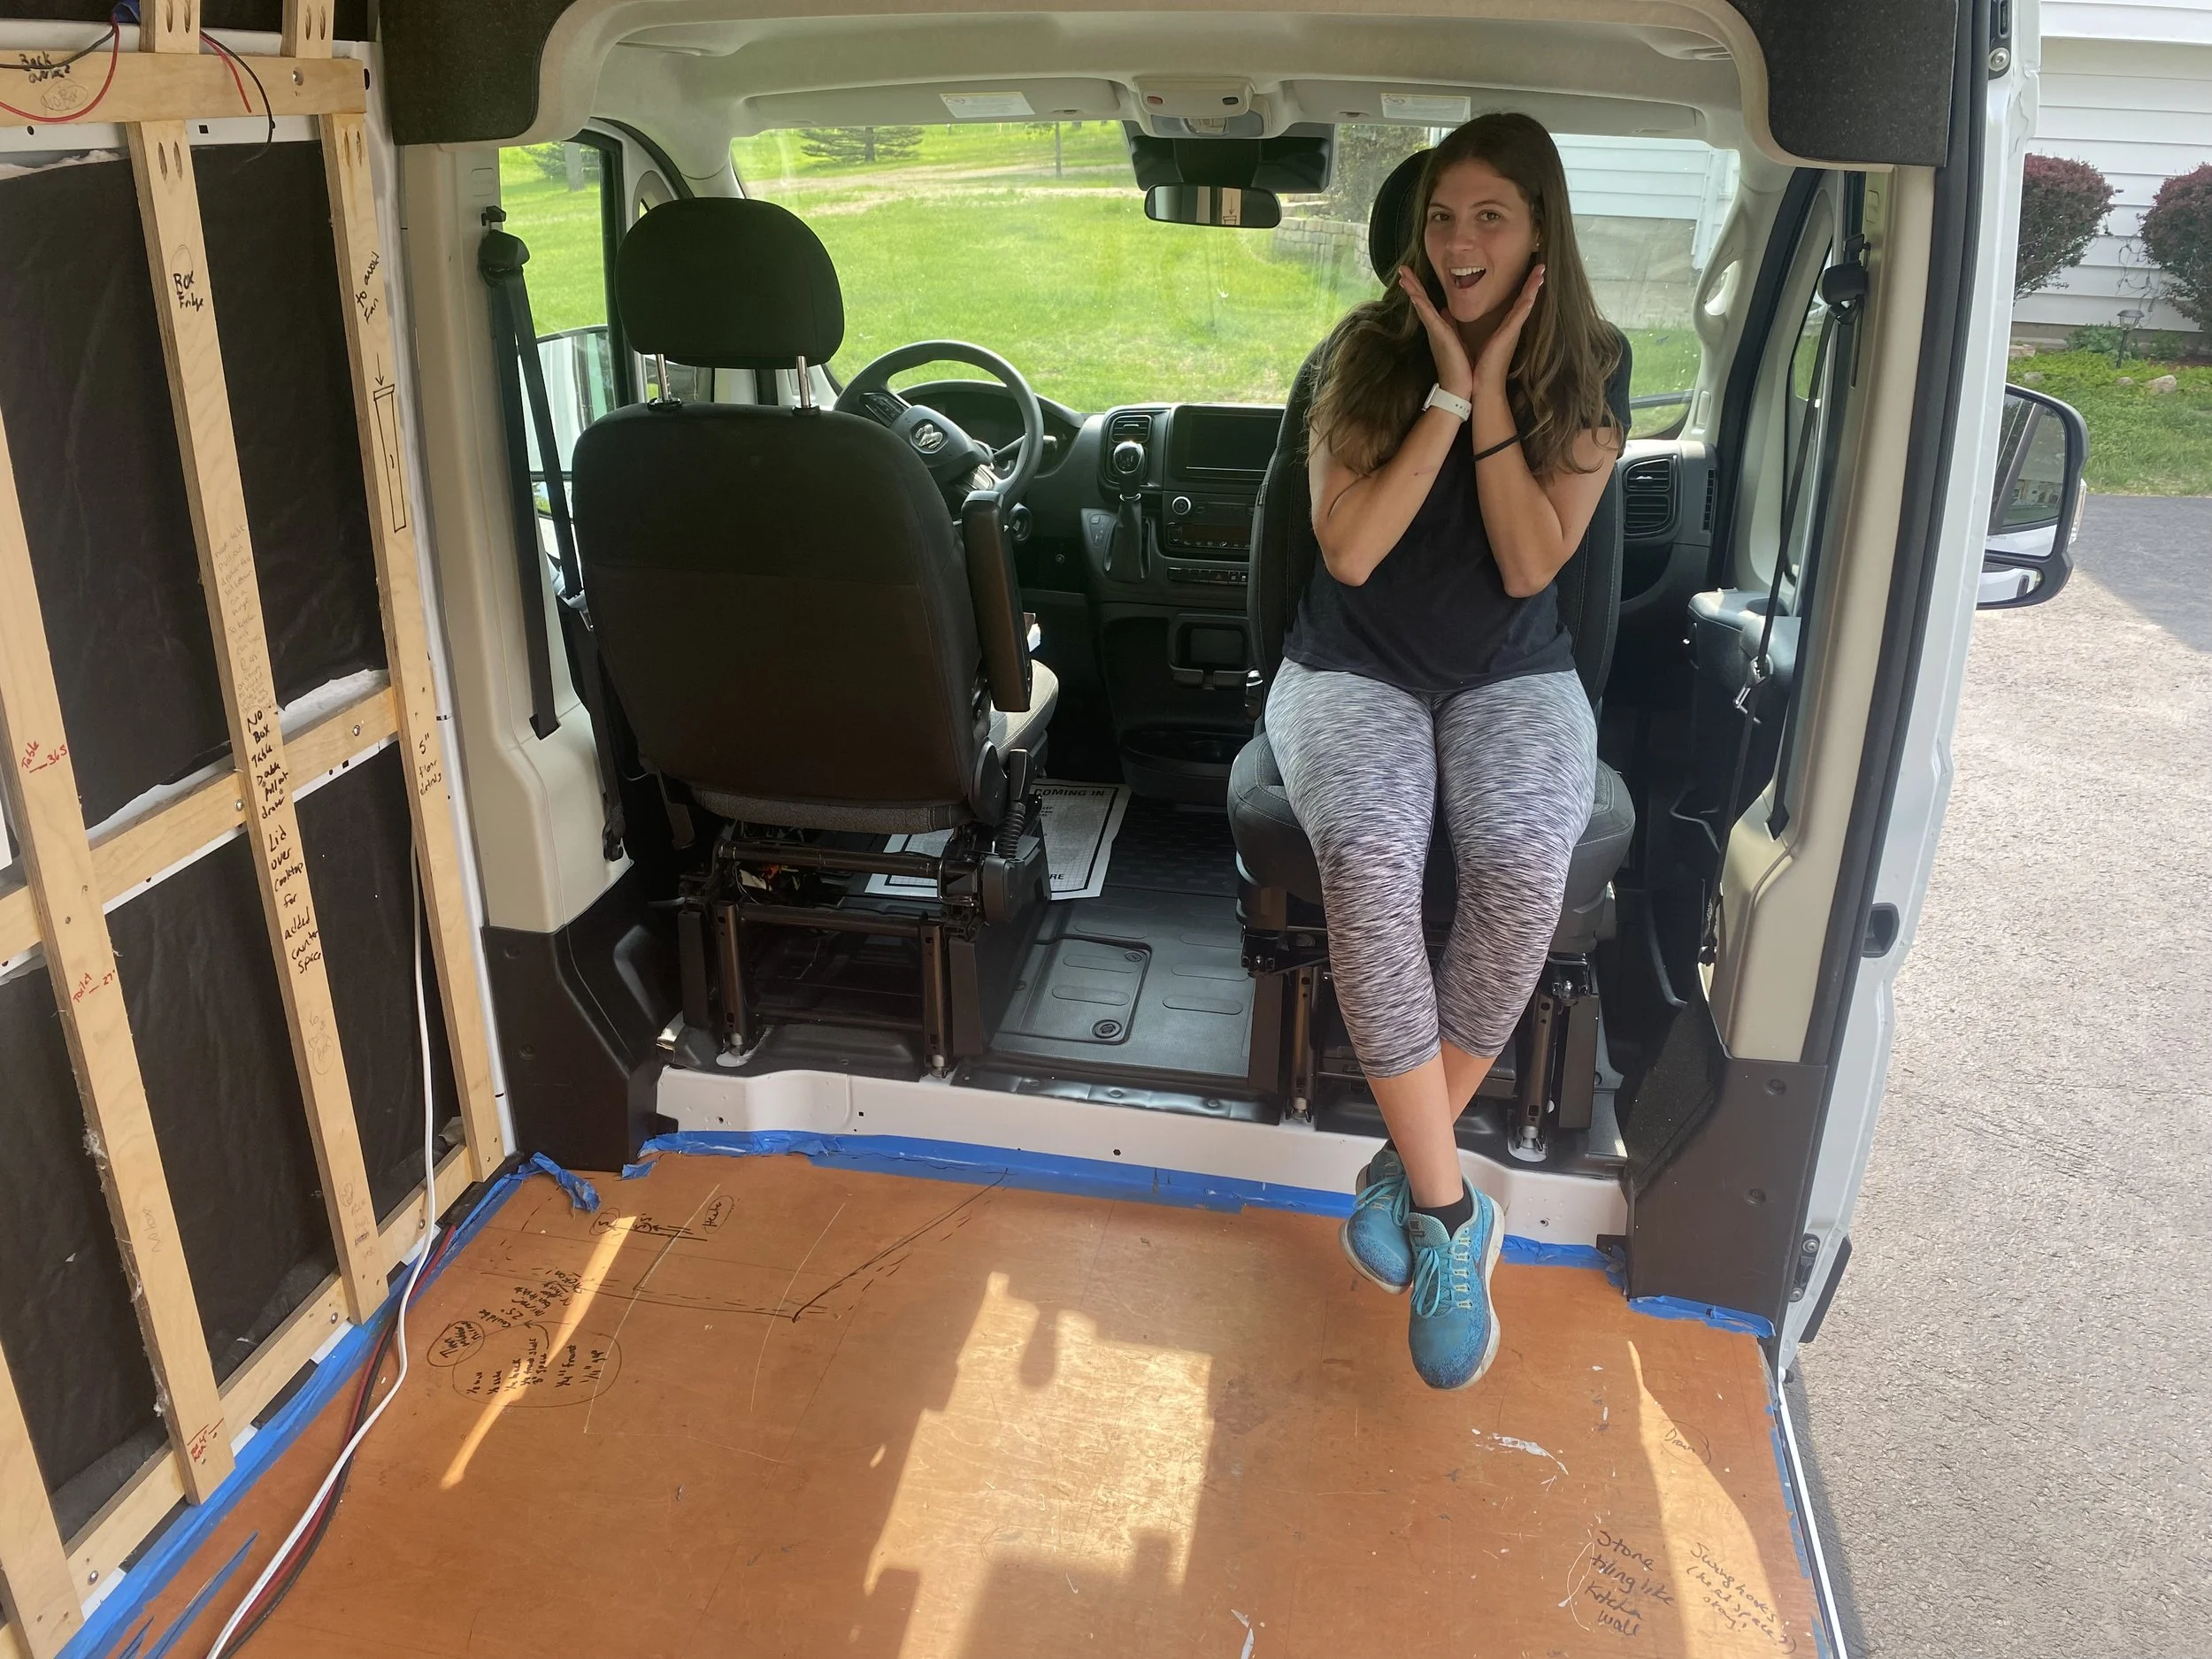
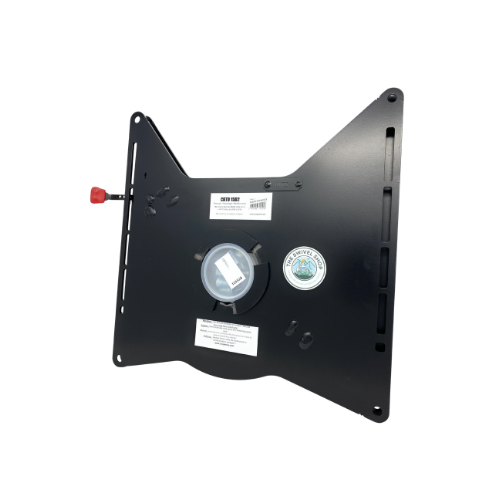
Swivel Seat
-
Scopema Passenger Swivel Seat from The Swivel Shop
Use code LAWLISS for a 5% discount
-
Additional seating in the van for me or a guest
A different place to sit for a change of scenery and views out the sliding door
Opens up the space in the van when turned toward the living area
-
Disconnect the van’s negative battery terminal before starting to avoid setting off any airbags or errors in the van’s computer system
Remove the seat bolts to take the seat out (the seat is very lightweight)
The swivel plate installs directly under the seat
Bolts and nuts are provided for the install
-
Adds about 1.25" of height — one of the lowest height increases on the market
Available for both passenger and driver seats
Swivels vary by van make and model — make sure to select the correct one
Pull the lever to release and rotate the seat for the swivel action
-
Order the van with factory-installed swivel seats
Scopema is one of the best aftermarket swivel options on the market
-
I wish I would have ordered the factory-installed swivel seats. The Scopema swivels are one of the best aftermarket options on the market, but they aren’t quite as smooth to turn as a factory swivel system from my experience - but looks like they are coming out with a newer version, which may be addressing this.
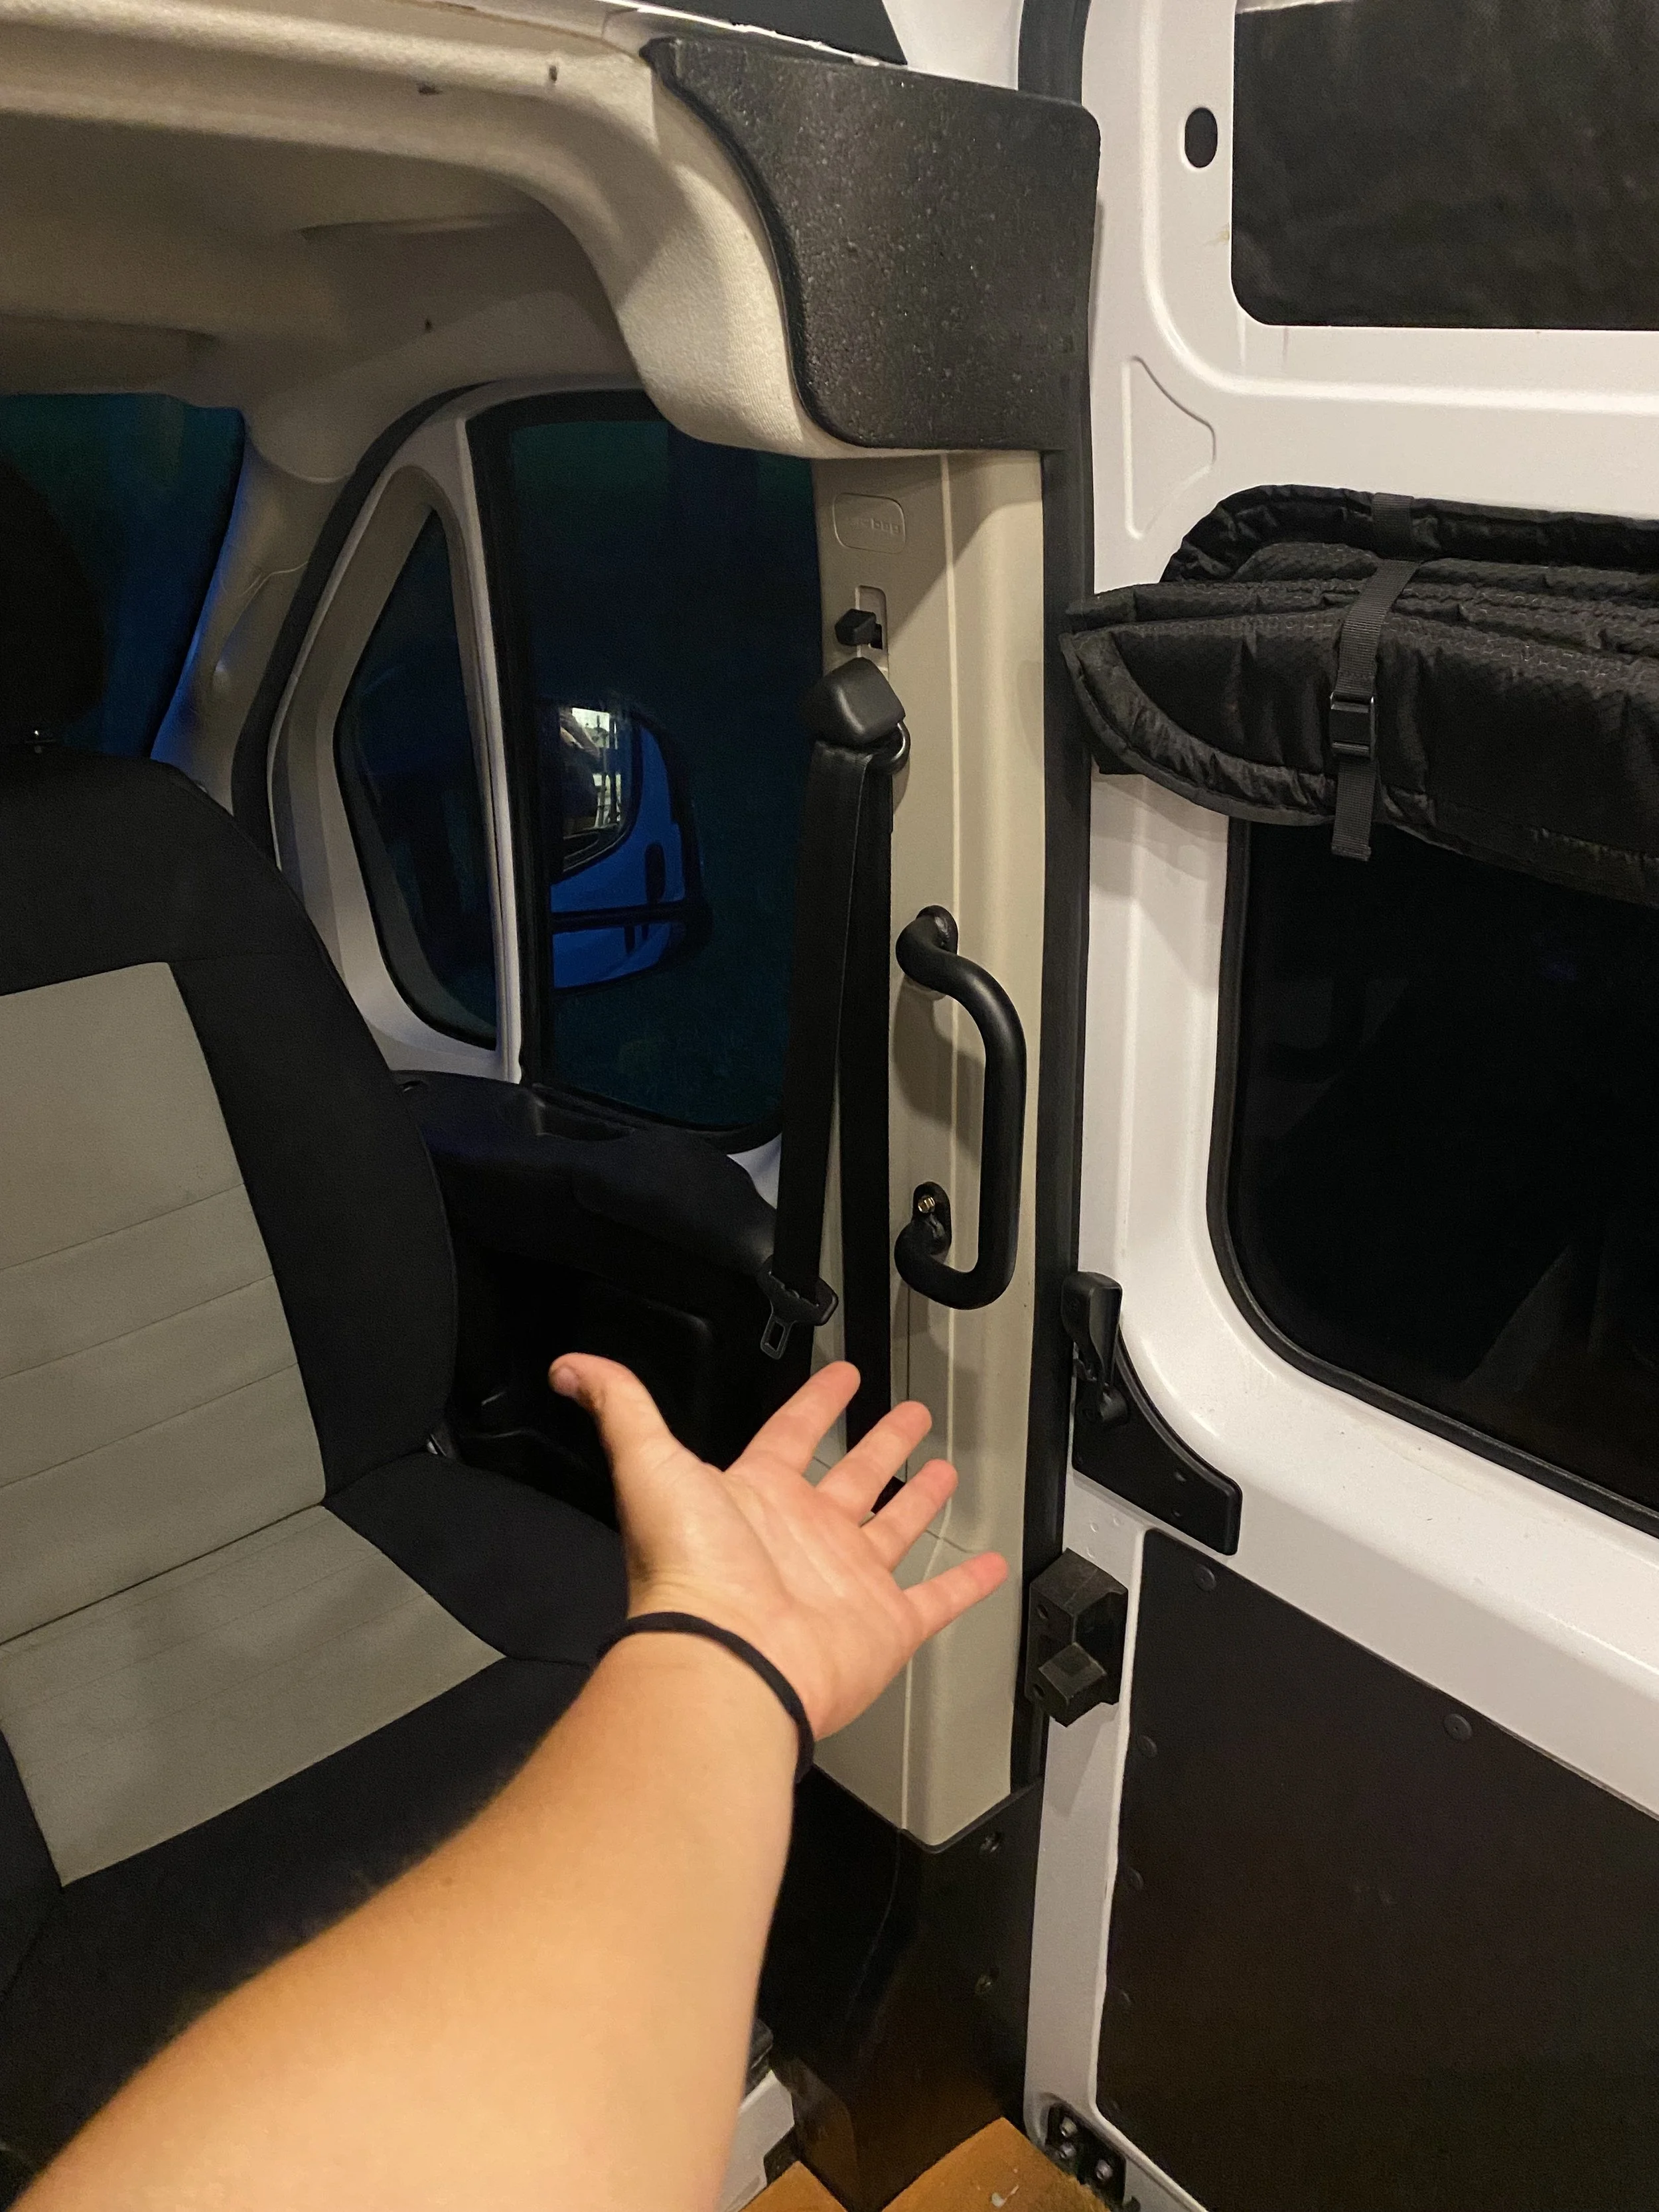
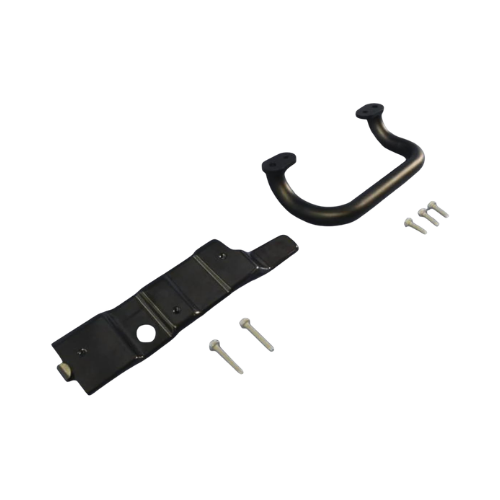
Entrance Handle
-
Secured directly to the b-pillar of the van body
-
It’s a big step into the van and having somewhere sturdy to grab is helpful
Less for me, more for other people that enter my van
-
Need to remove the seat belt and upper and lower trim covers on the van pillar
Installs directly to the metal structure of the van with the provided bracket - no drilling required
Will need to drill two holes into the plastic trim piece using the template given for proper placement
-
This handle is specifically designed for Ram ProMasters
Extremely sturdy
-
Install a generic handle by screwing it into the van’s structural beam
Not as secure as a purpose-built handle
Potential for rust from drilling into the van itself
Must avoid existing holes or wiring in the van beam when drilling
Reinforcement material may be helpful for additional support
-
It’s a big step into the van, and before installing this handle, everyone who came in would look for something to grab and struggle getting in and out. With this handle, people have something solid to hold onto and getting in and out of the van is much easier.
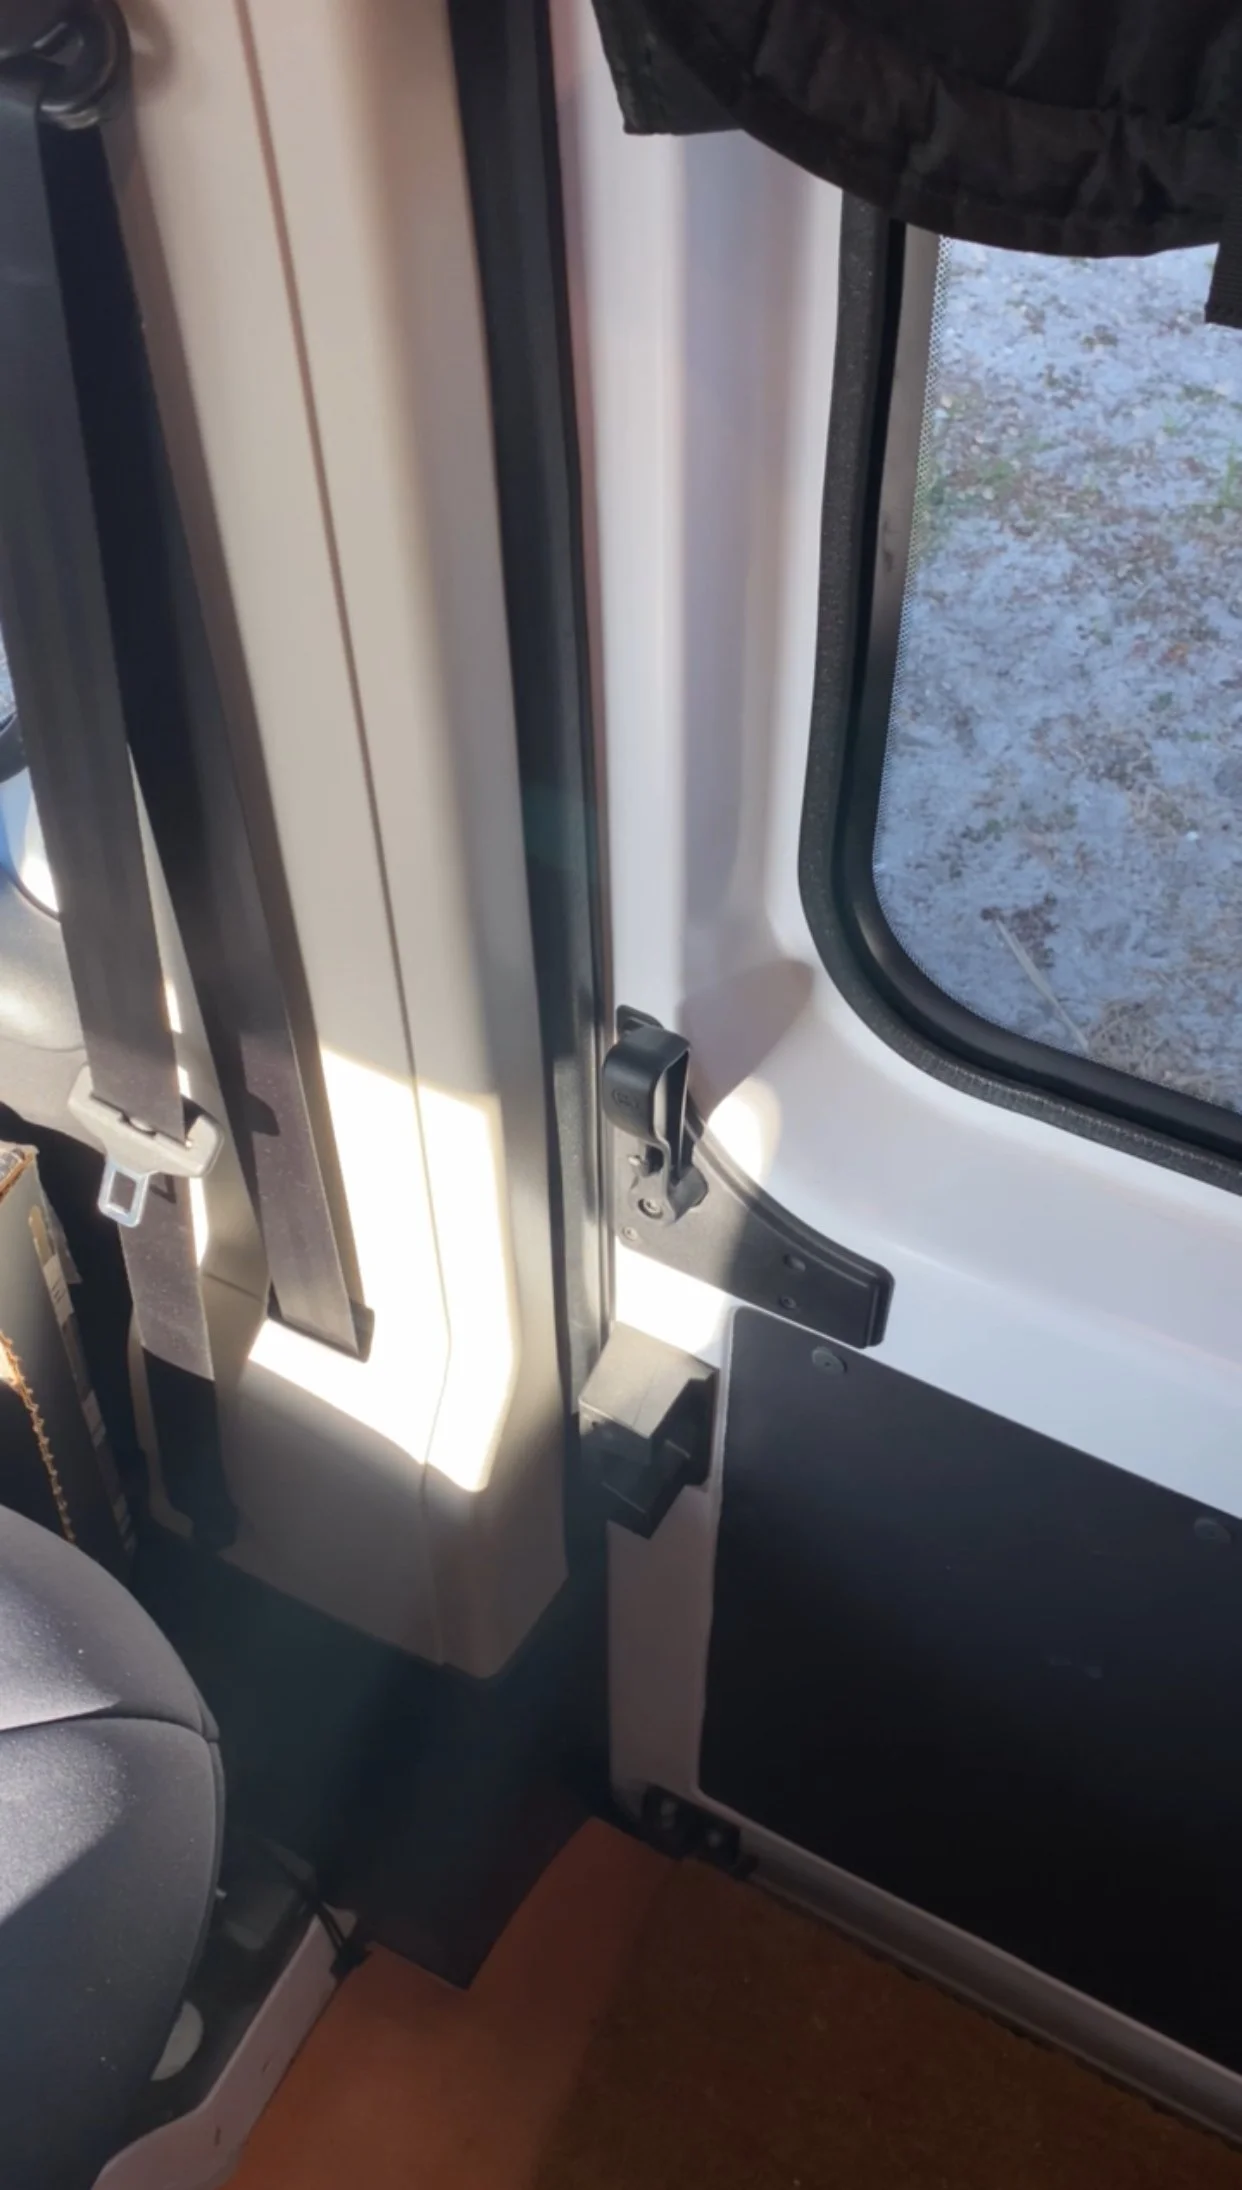
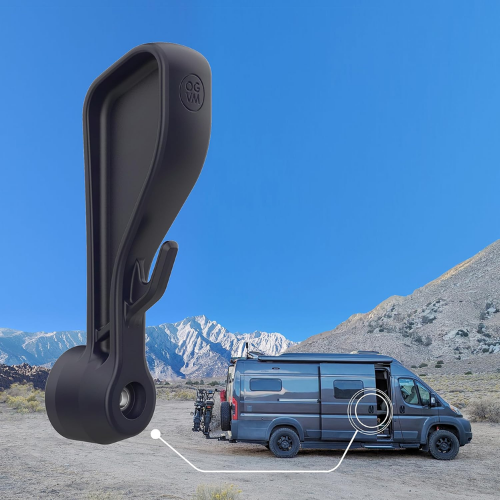
Sliding Door Handle
-
Brand: Open Glass Van Mods
Larger interior sliding door handle with better ergonomics than the OEM handle
Built-in hook to hang keys or a small bag
-
Easier to open the sliding door from inside — can be done with one finger
Fast and easy install — takes less than 5 minutes
-
Remove the original handle by unscrewing the single bolt
Install the new handle using the same bolt
-
This is an inexpensive, fast, and easy upgrade that greatly improves the functionality of the sliding door. I can now open the door with one finger, whereas before it took effort and most people couldn’t figure it out. It was honestly comical watching people try to open the door because no one could do it without my help.
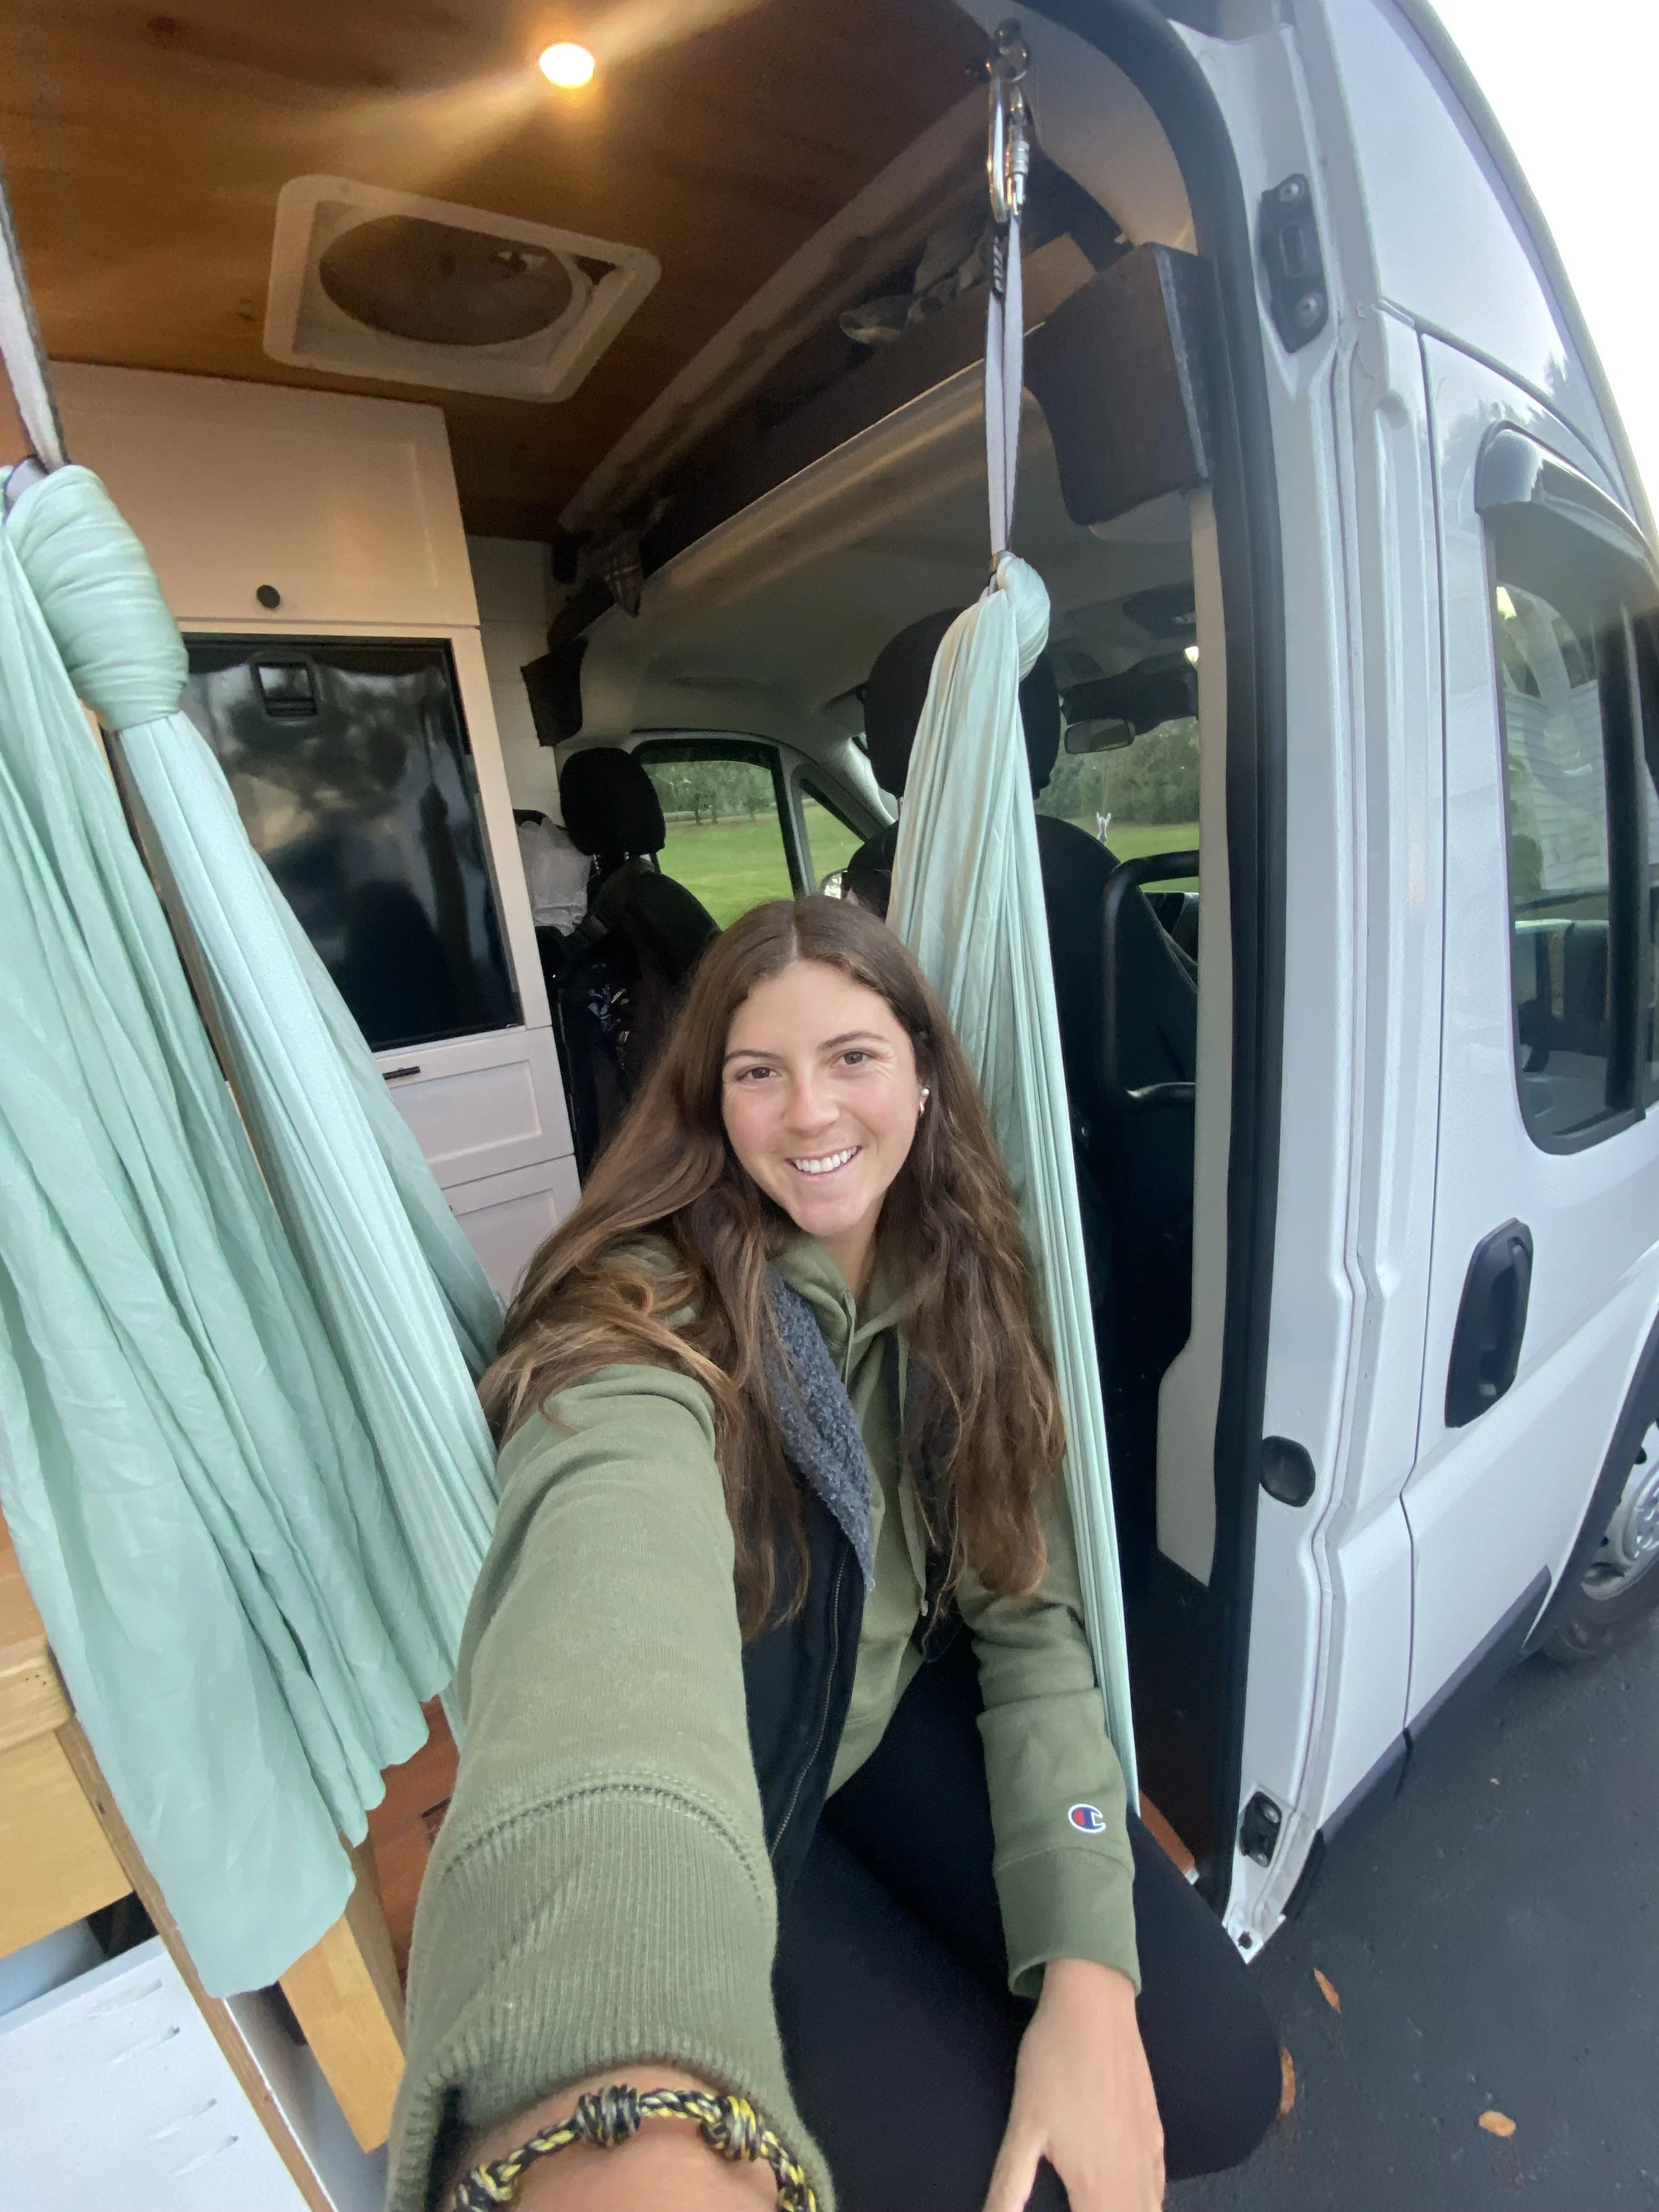
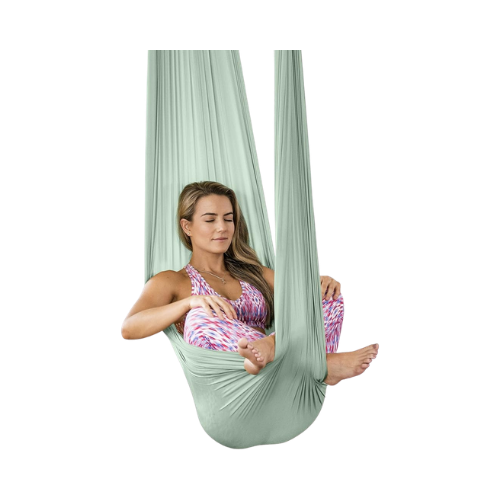
Swing
-
Aerial silk that can be used as a swing in the sliding door or rear door entrance
Can also be set up as a hammock running the full length of the van from front to back
-
Another place to sit and relax in the van
Something fun that adds a unique element to the space
A comfortable place to hang out with the doors open and enjoy the view
Can be used as a hammock for resting or lounging
Adds a flexible seating option without taking up permanent space
-
Drill two holes in the van rib at least shoulder-width apart so the swing feels comfortable to sit in
Treat the exposed metal with a rust prevention, then install two plusnuts in the holes
I used 5/16-18 plusnuts which are larger and more sturdy
Thread eye bolts into the plusnuts to attach the swing carabiners
-
Be careful swinging backwards so you don’t hit your head on anything
Avoid drilling near existing openings in the rib since the structure is weaker in those areas
Inspect the rib thoroughly before drilling to make sure you aren’t hitting hidden structure behind the beam
-
Having a swing in the van is a fun idea that also gives me a relaxing place to read, rest, or enjoy the views with the doors open. I’ve had no issues with the van rib supporting my weight and the swinging motion.
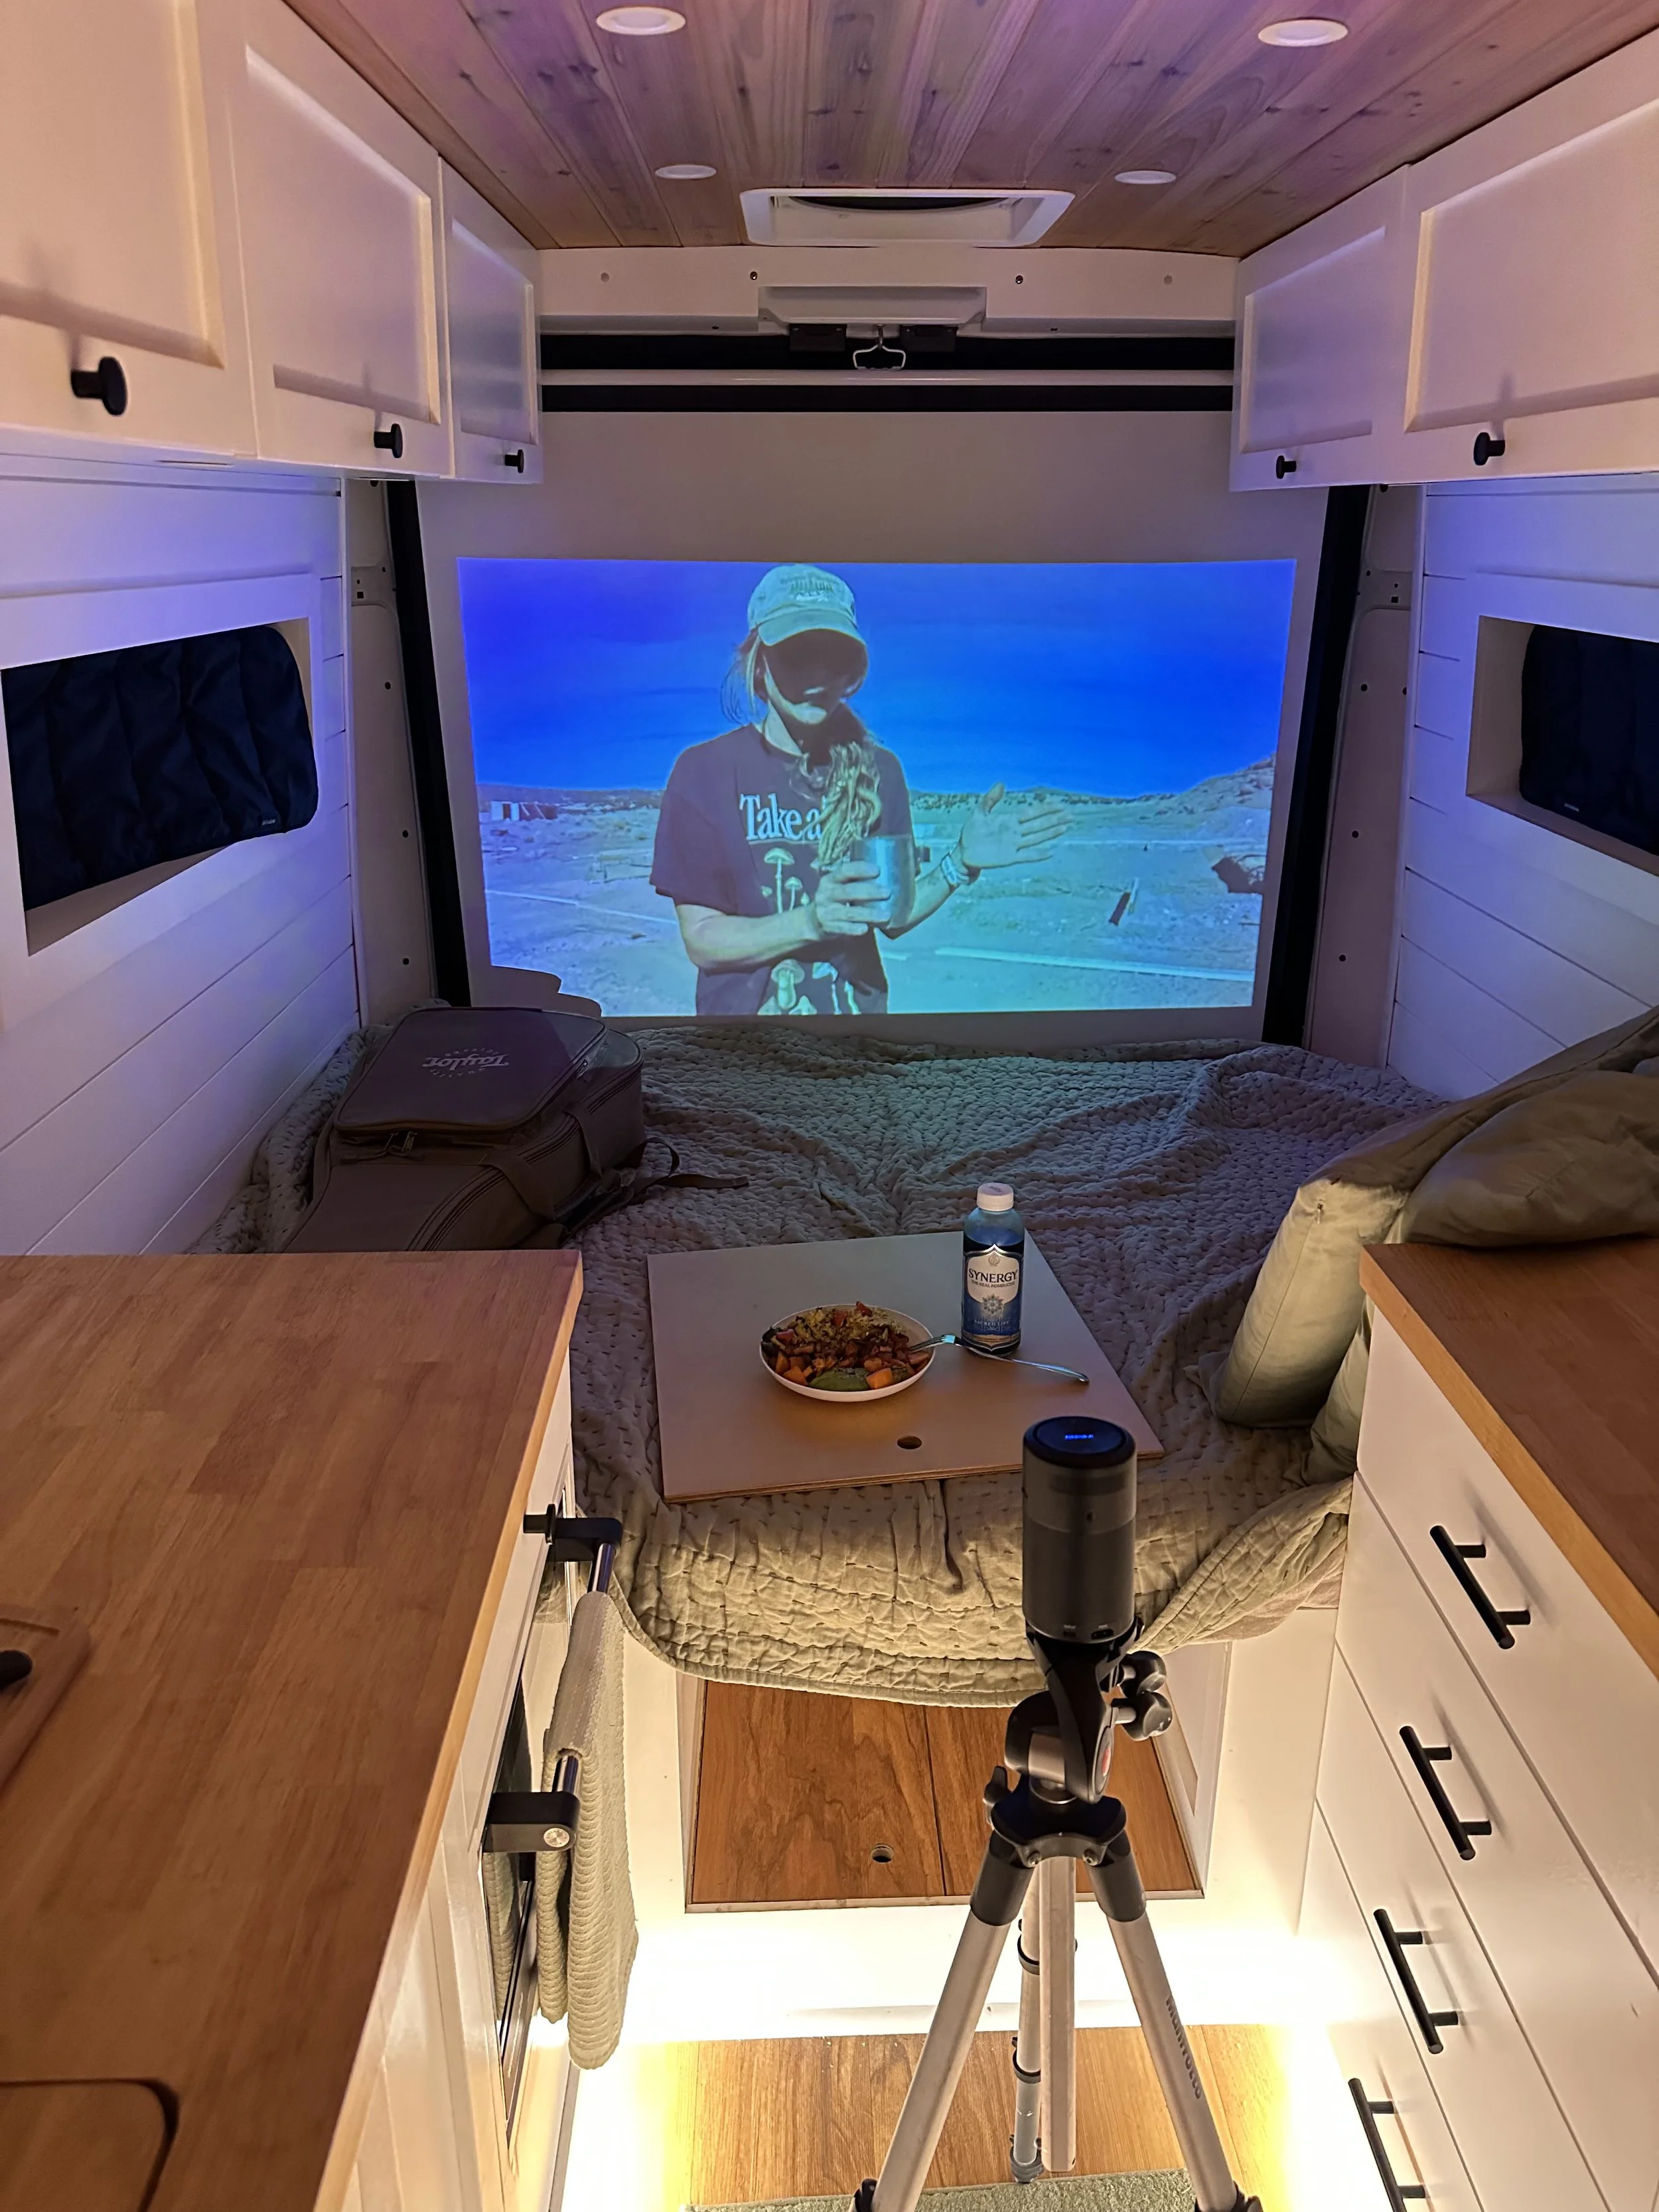
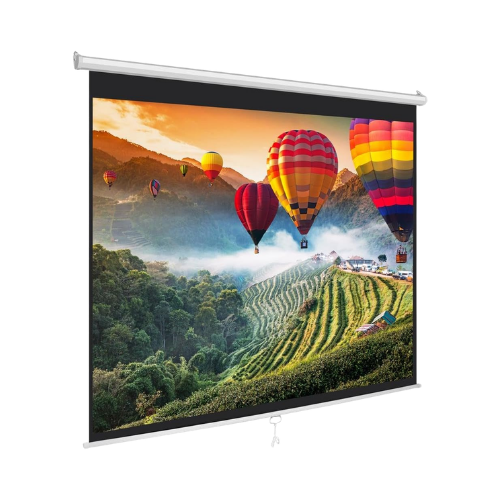
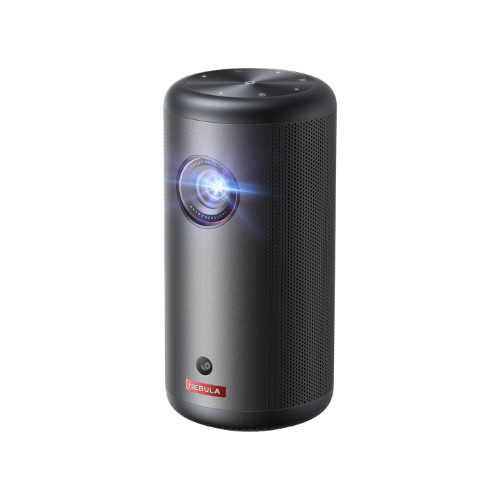
Movie Theatre
-
70" projector screen mounted on the back ledge of the bed area and hidden behind the cushions
Can be turned around for viewing out the back doors too
Nebula projector that can sit on the counter, be used on a tripod, or be mounted in place depending on the setup
-
Cozy nights in watching YouTube, shows, or movies
Movie nights with friends outside the back doors
Larger viewing experience than a phone or tablet
Easy way to relax after a long day of driving or exploring
Great for rainy days or downtime in the van
Creates a fun and unique van life experience
-
Projector screen hooks onto two screws on the bed ledge so it can be easily pulled up and secured in place, or turned around for viewing outside the van
Install a plusnut in the rear van rib and thread in a hook bolt to hold the projector screen up
Mount the projector wherever it works best for viewing, such as on a tripod, counter, or permanent mount
-
Screen
Projector screen hidden behind the bed mattress
Screen is technically a pull-down design but used as a pull-up in this setup
Available in different screen sizes and colors
Projector
Nebula projector
The size of a soda can
Built-in access to streaming services and YouTube
Can be controlled from your phone through the Nebula app
Great viewing quality
Can sit on the countertop, be used with a tripod, or mounted in place
-
Install a traditional TV in the van
Use a pull-down projector screen mounted under overhead cabinets instead of a pull-up setup
Hang a projector screen cloth on hooks when needed
-
One of the best ways to spend a cozy night in the van. It’s simple to set up and easy to use, and it makes watching YouTube or a movie feel much more immersive than a phone or laptop. It’s also fun to turn the screen around and have a movie night outside the back doors.
Mattress
-
Custom covers from Sew Cush
-
I have a convertible bed to u-shaped couch instead of a fixed bed
The two center bed pieces become the back rest for the passenger and driver side wall when in couch and table mode
The back middle bed box has a separate cushion for couch and table mode, but gets stored under the table at night when in bed mode
-
Used an electric carving knife to cut the mattress
Keep cuts square and straight so the cushion covers fit properly
Accurate cuts help prevent gaps between mattress pieces when in bed mode
-
3" mattress thickness works well for me and keeps the bed profile low
Thinner mattress allows enough headroom to sit under the cabinets without hitting my head
Cushion covers outsourced to Sew Cush
Durable and washable material
A variety of colors and materials to choose from
Each cushion cover has a zipper for easy removal
The covers fit perfectly
-
Install a fixed bed and use a standard mattress
-
I wouldn’t change a thing about the mattress or covers. I find the mattress to be comfy and the cushions hold up very well.

Related Resources
Watch the Tutorial
Shop Product Links
Code LAWLISS for a 5% discount at The Swivel Shop

As an Amazon Associate, Lauren will receive a small commission from any qualifying purchases made through these links, at no additional cost to you.Thank you for your support!Ready to build with confidence?
Follow step-by-step installation guides that break down the most complex parts of the build into clear, manageable steps.
Need help planning your build?
Book a 1:1 Consultation