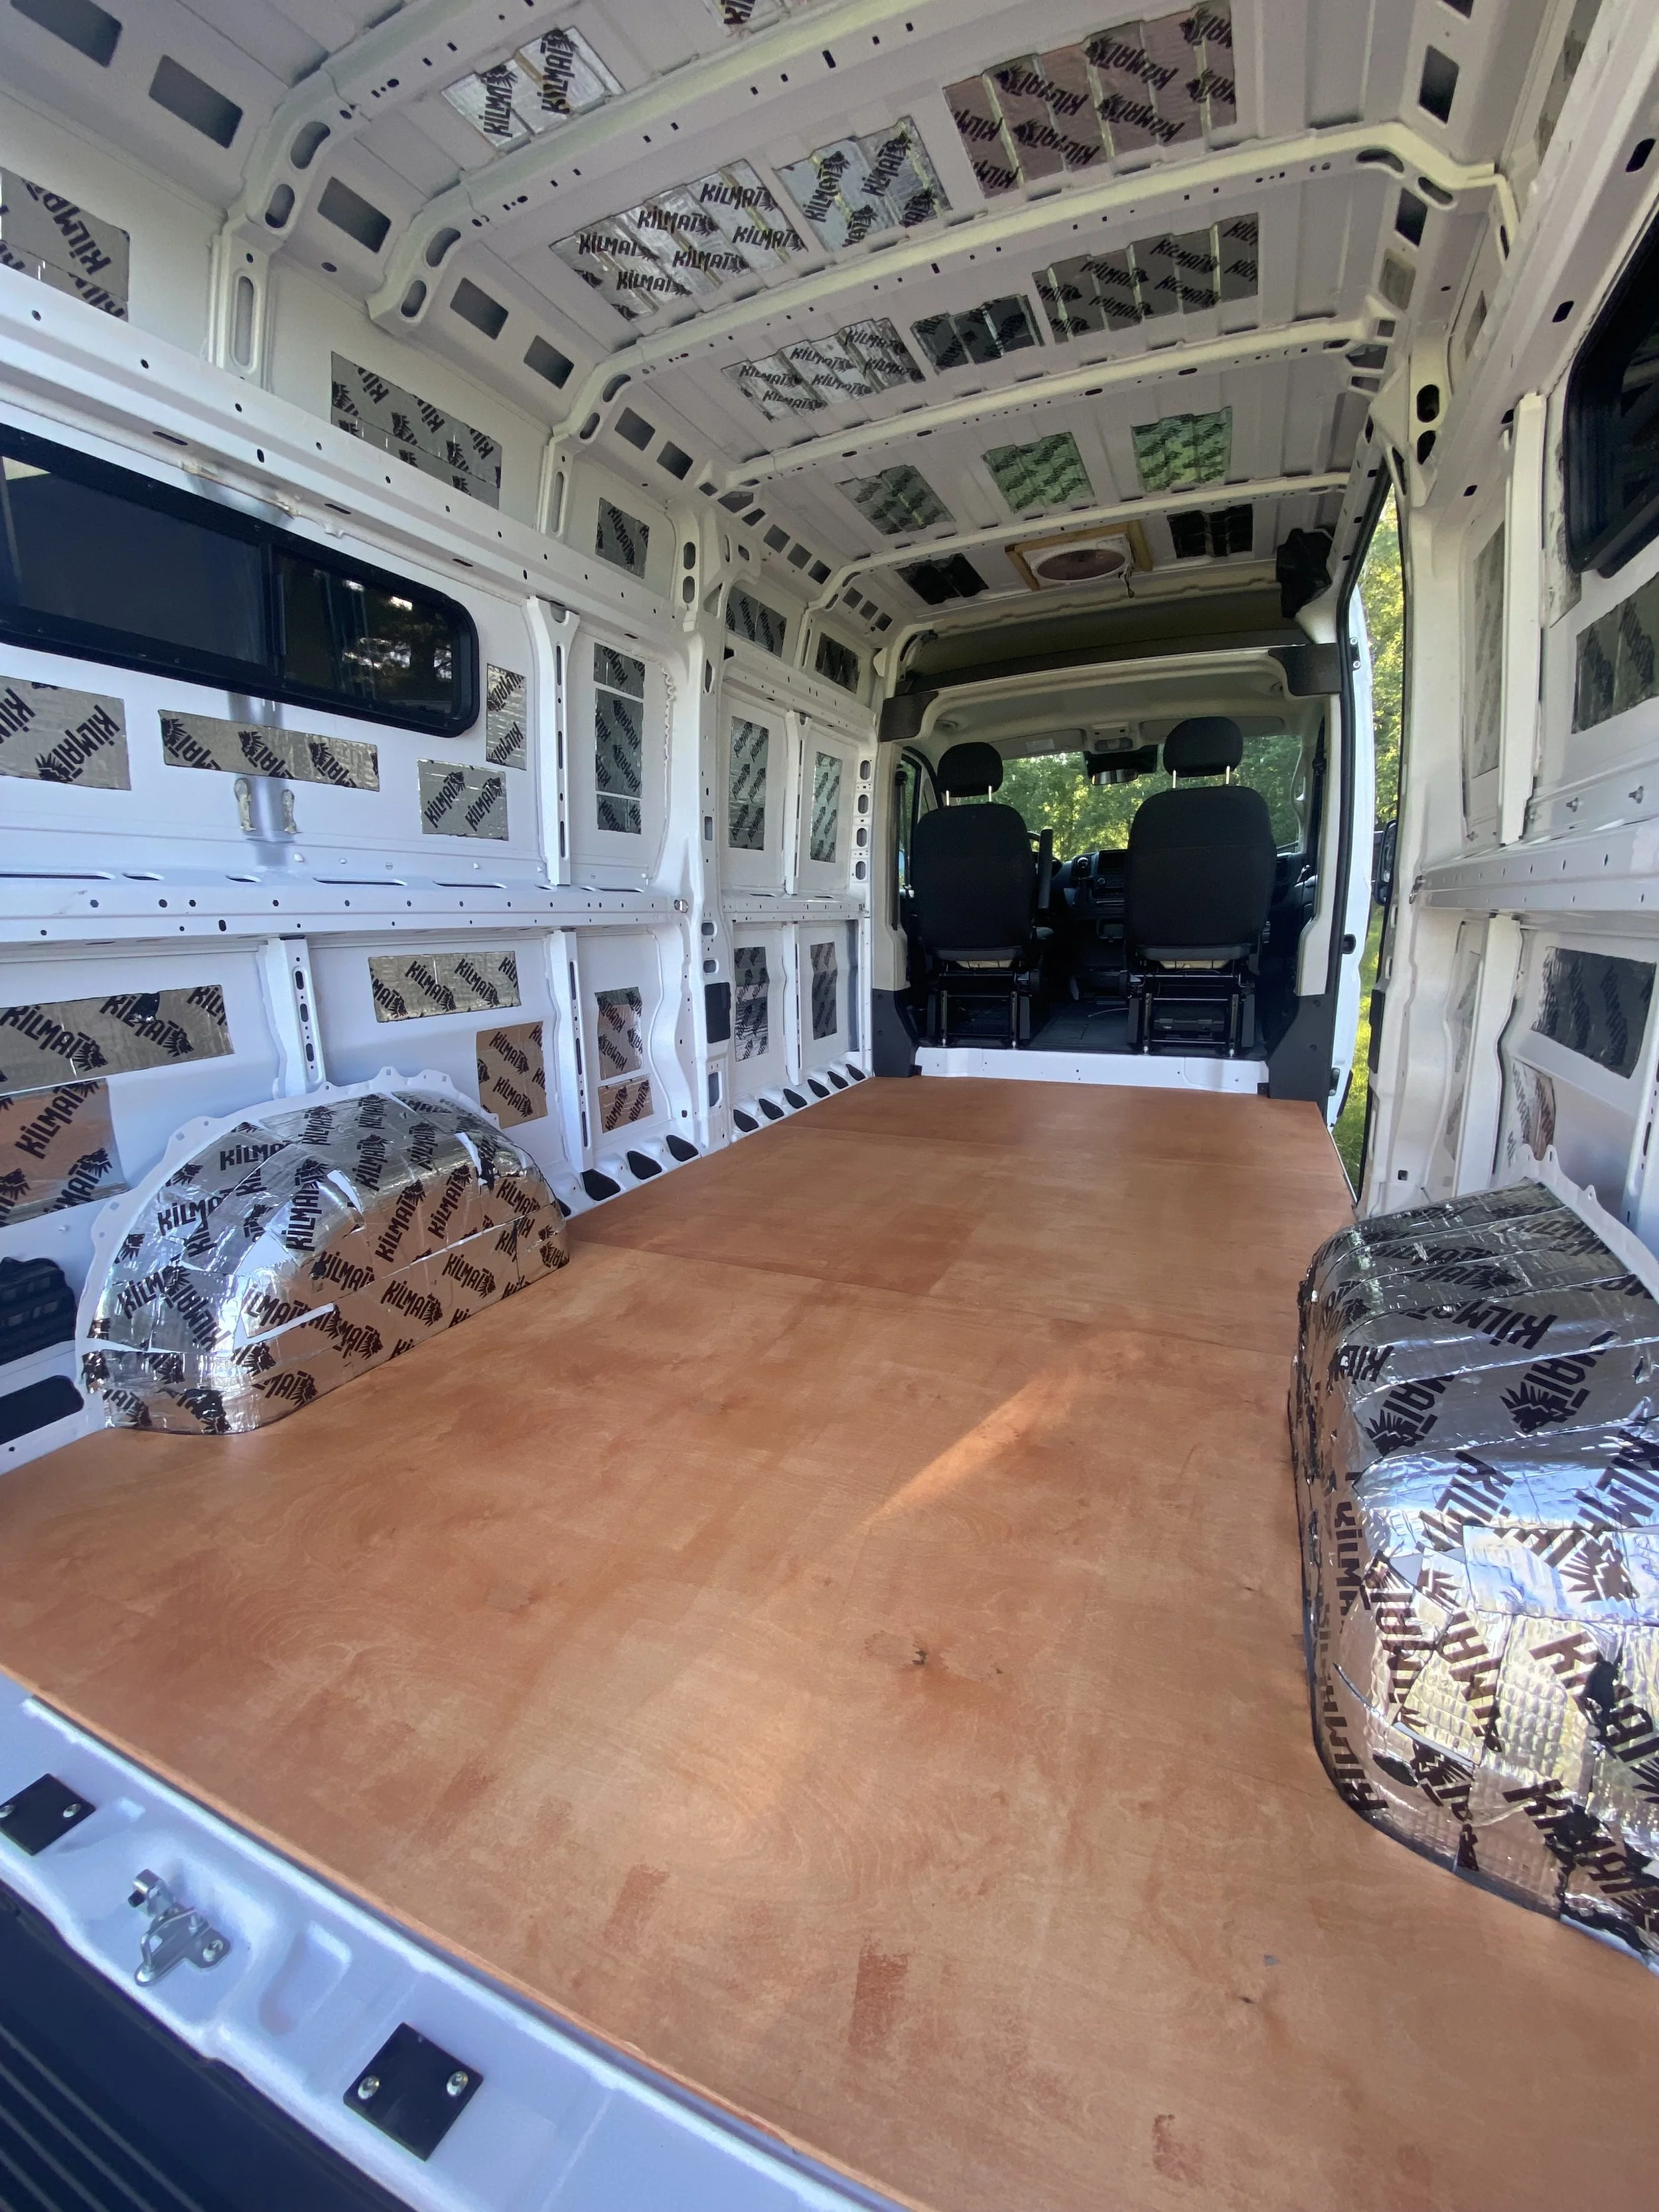
Subfloor & Final Floor
Subfloor
-
1/2” Baltic Birch Plywood with Thompson’s Water Seal
*No insulation material
*Didn’t fasten the subfloor down
-
Foundational structure for the rest of the build
To screw cabinetry directly to the subfloor for extra security
-
Make a cardboard template if a floor mat did not come with your van to trace.
I don’t believe in insulating the floor - heat rises and the floor will be cold regardless - save on weight, time, money & height
Solution for when the floor is cooler: heated floor pad or radiant floor heating, lay a rug, wear socks or slippers
I’ve been in vans with insulated floors and they are still cold
Leave a 1/4” gap around the entire subfloor perimeter to account for expansion
No need to secure your subfloor in place - the cabinetry on top will keep it in place
-
Have the subfloor seams go side to side, instead of front to back to avoid issues in the galley
Don’t fill the section in between the van floor ribs, those are there for a reason to help with airflow under the floor and prevent moisture from getting trapped
-
I’d do my subfloor the same exact way. 1/2” plywood, seams going side to side and no insulation with a 1/4” perimeter gap.
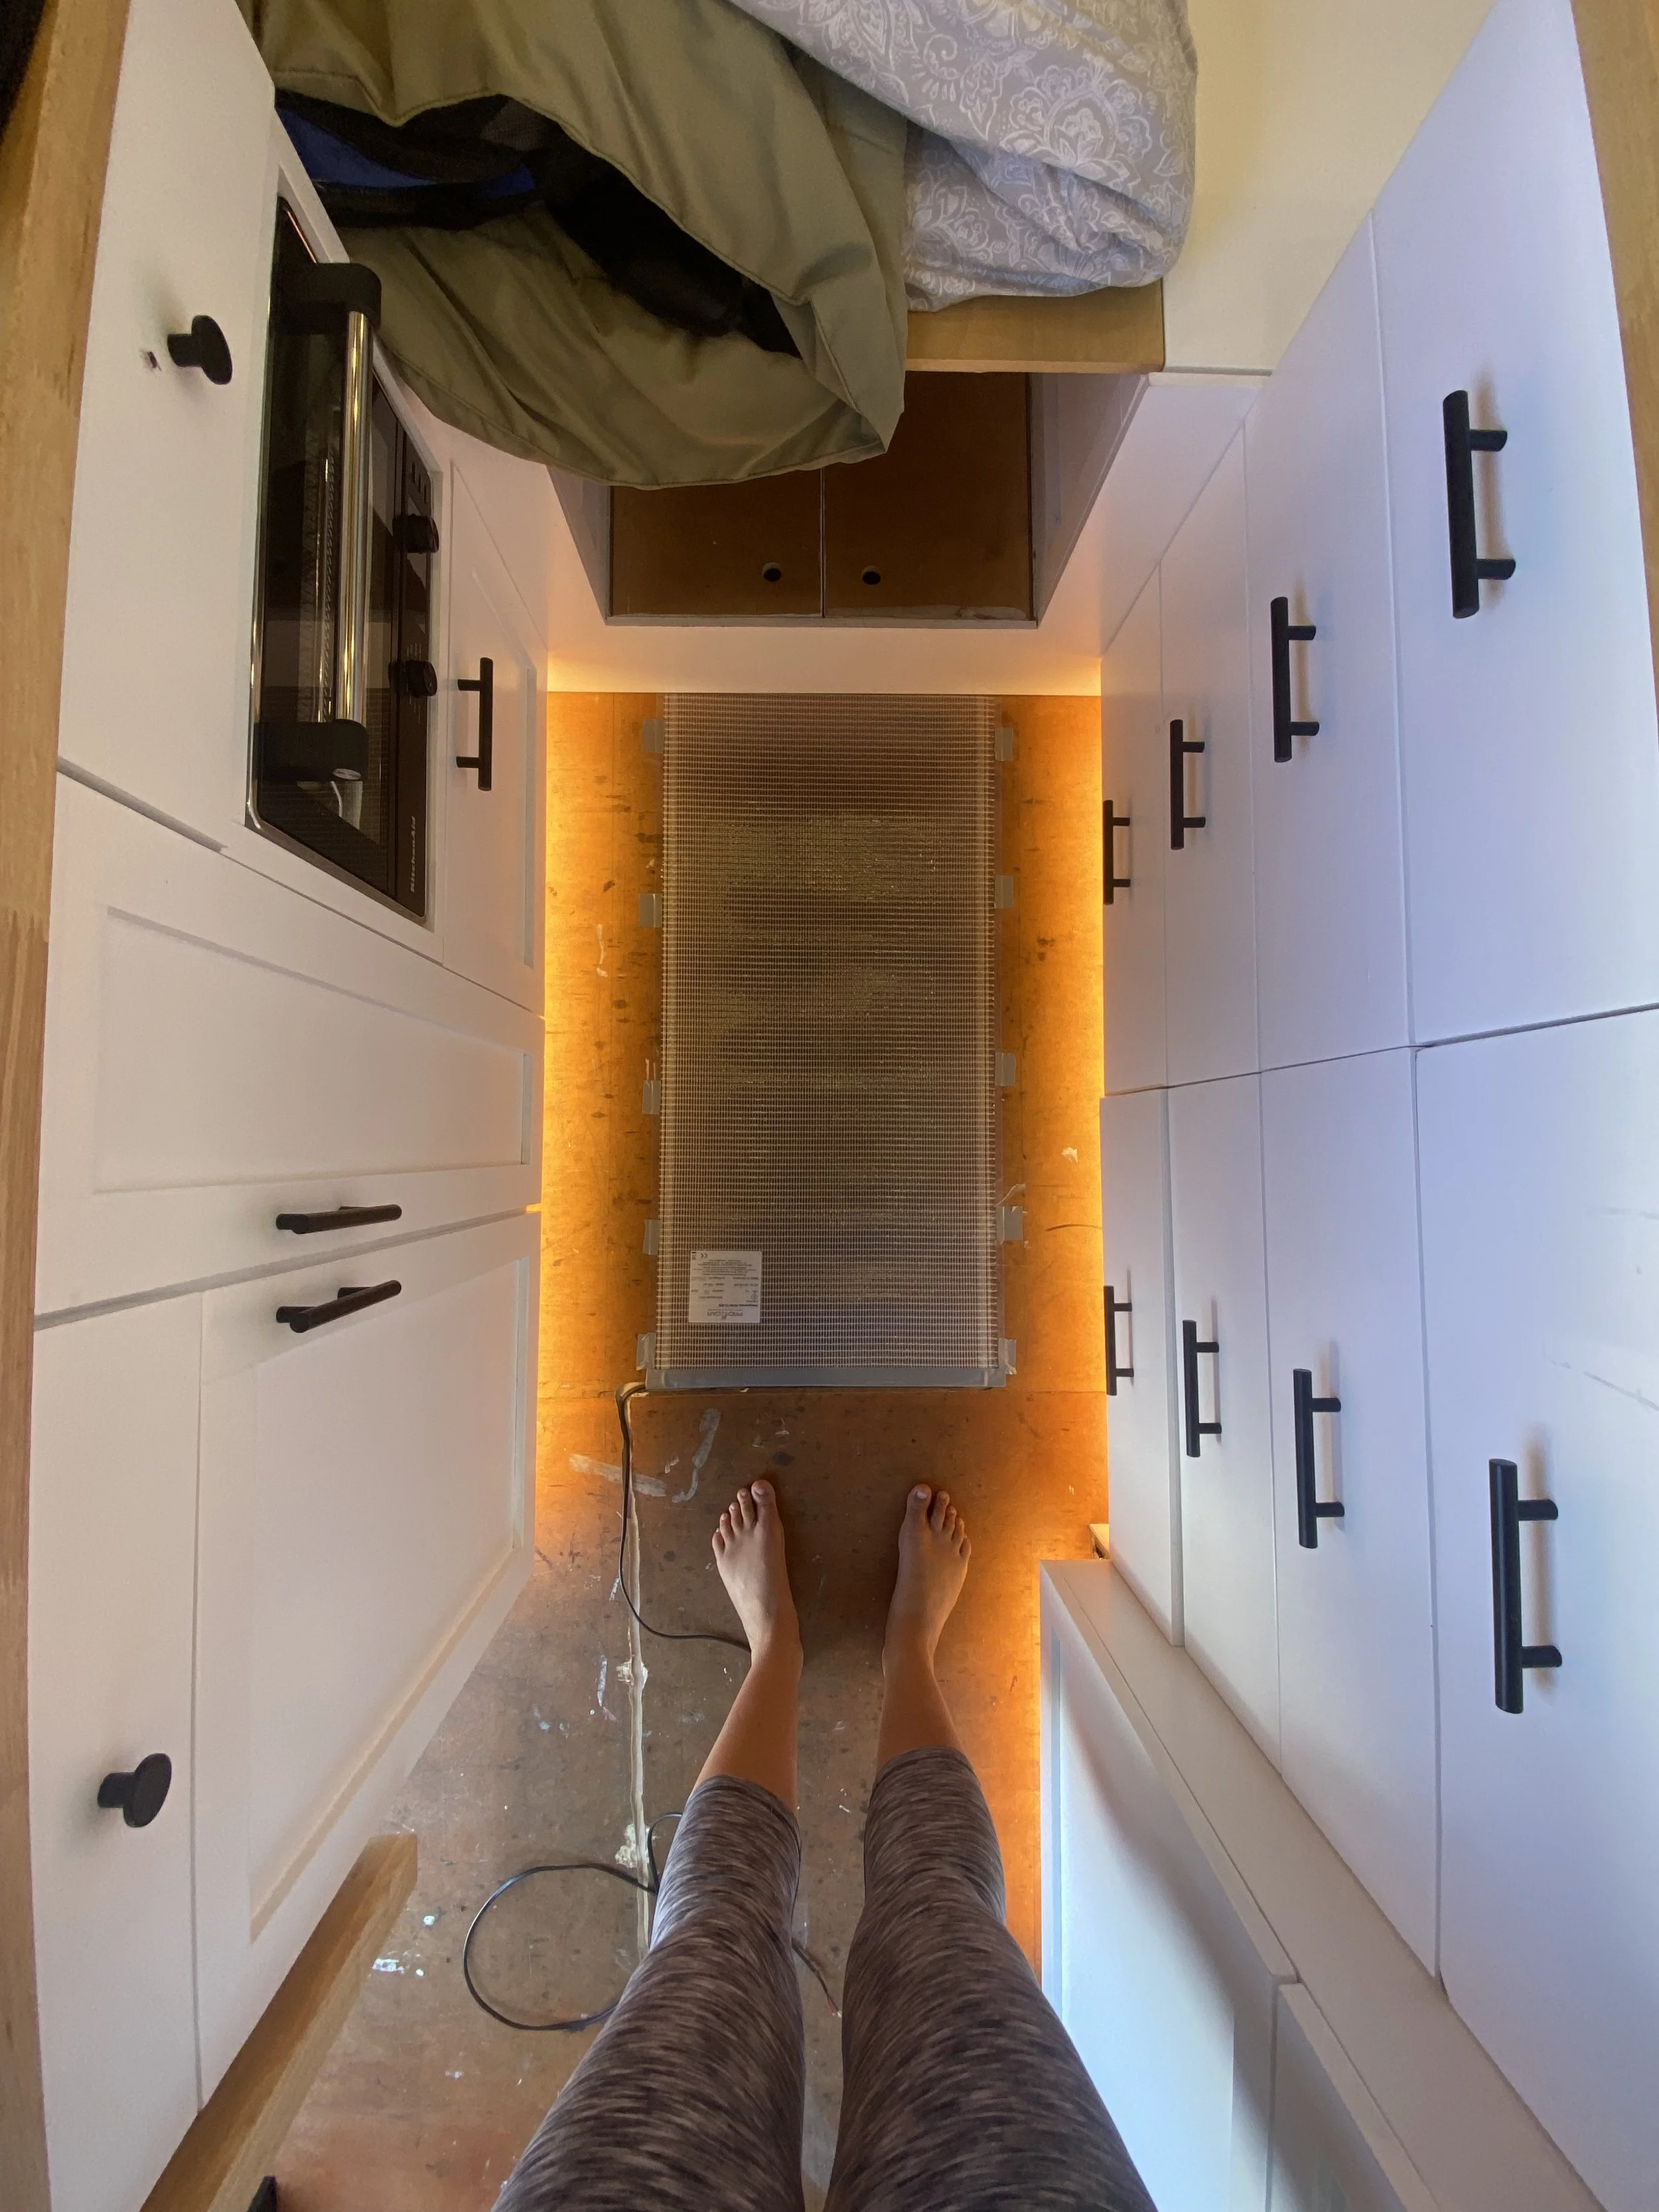
Heating Mat
-
12 volt Heating Pad from Expedition Upfitter
-
To keep the floor warm while in colder climates
-
12 volt is more efficient if you have a 12 volt battery bank because no conversion is necessary to power the load
Don’t daisy chain these specific mats
These mats can be cut to length, but not width
-
This does more to keep the floor warm than insulating the subfloor
Make sure whatever material you are installing it over and under is able to have a heat source in contact
I installed it where I’ll be standing in place the most - between my kitchen and dresser, instead of the sliding door entrance
I put the on/off switch in the frame of my driver bunk window by the bed so it is centrally located and I can turn it on and off from bed
-
Radiant heated floors
Uses hot water through hoses inset into the subfloor
Insulate the subfloor with XPS
Won’t make the floor warm - best to use a heat mat or radiant heat
Lay a rug, wear socks and slippers to keep your feet warm
-
Although I don’t use it much, I love it when I do. It pulls very little power and keeps the floor toasty.
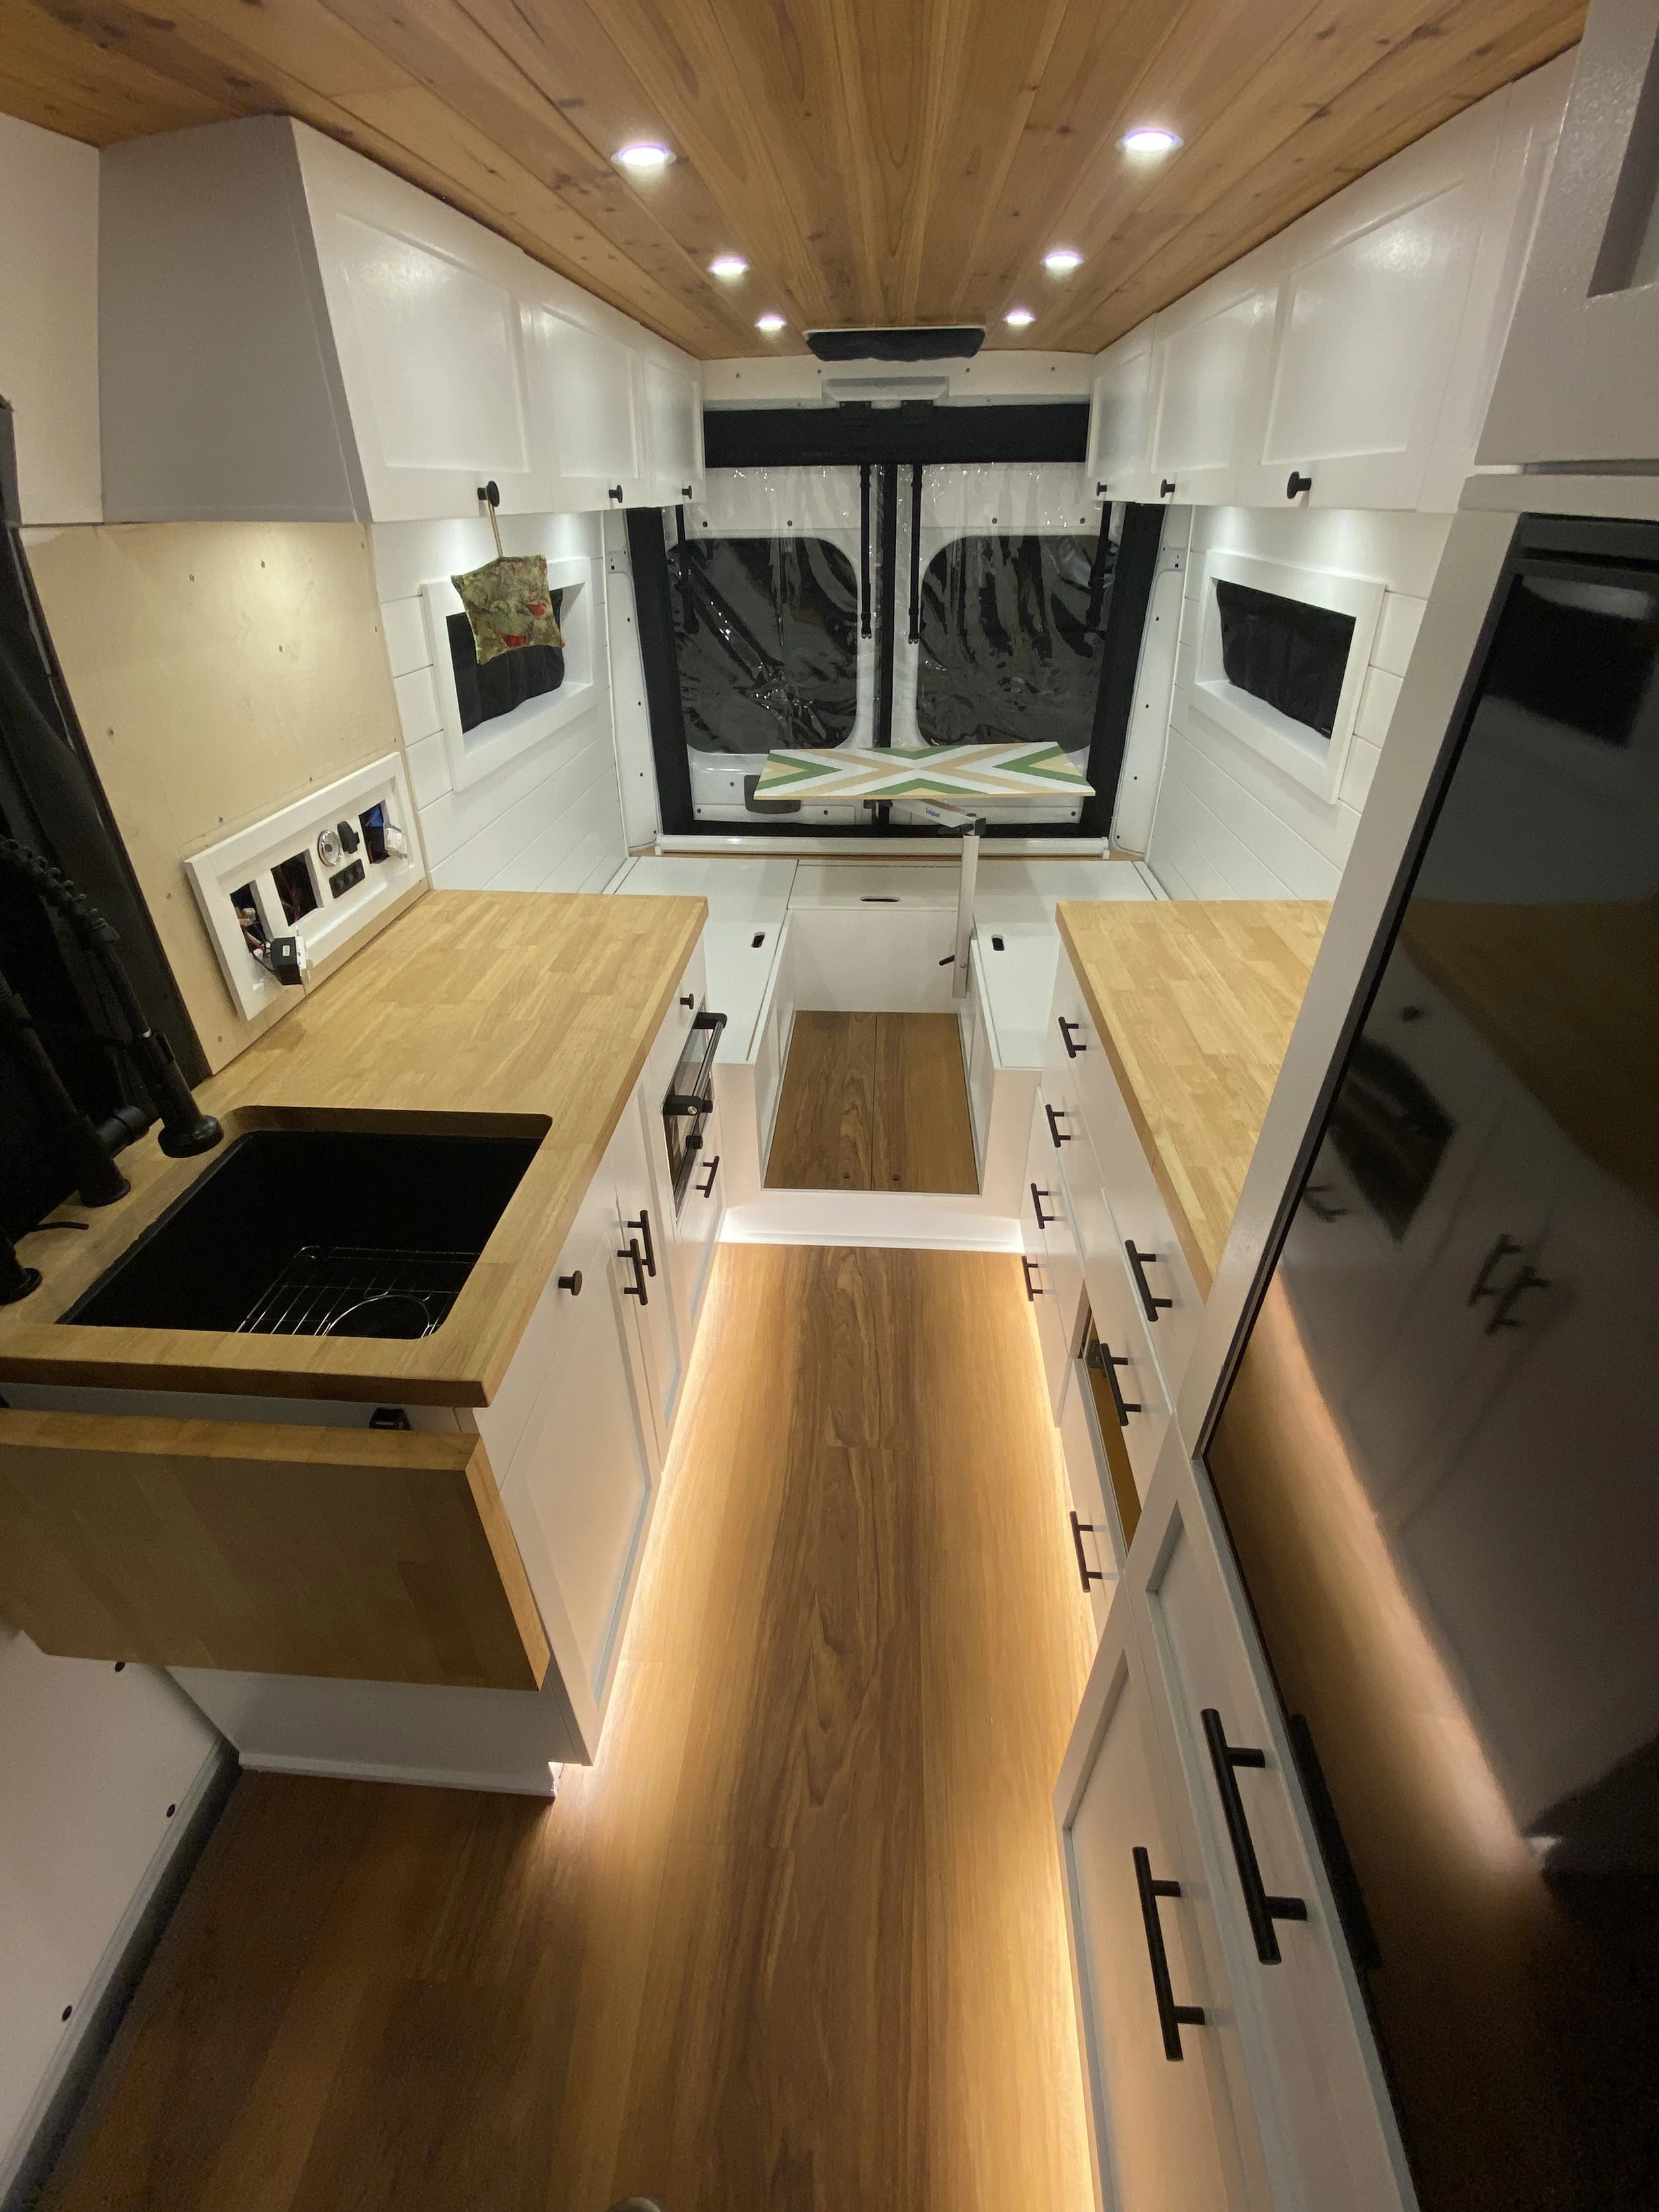
Final Floor
-
Luxury Vinyl Planks (floating floor)
Floor Nosing with Nails in Sliding Door Entrance
*My overall floor is less than 3/4” thick, which was intentional for more head space since I’m so tall
-
No gluing
Strong connection that is water tight
Scratch resistant
Durable
Different colors and design choices
-
Install a floating floor after installing your cabinets, not under your cabinets
Saves on material, money and weight
The final flooring won’t buckle and can be easily replaced if needed
Leave a 1/4” gap around the entire perimeter
Use quarter round molding and brad nails to cover the 1/4” gaps after
Screw or nail a nosing strip in the sliding door entrance to cover the flooring end
Stagger where each board ends to create a strong locking floor
Start in the furthest inside space and work towards the sliding door.
Install the floor towards the very end of your build to avoid spills or damages that could be caused by the build process
-
Vinyl sheets
I’d avoid vinyl sheets and glue down options
-
I love my floor and it has held up so well over time. I’d do everything the same again.
Related Resources
Watch the Tutorial

Shop Product Links


Ready to build with confidence?
Follow step-by-step installation guides that break down the most complex parts of the build into clear, manageable steps.
Need help planning your build?
Book a 1:1 Consultation