Puck Lights
-
12 volt dimmable warm white puck lights with a white body
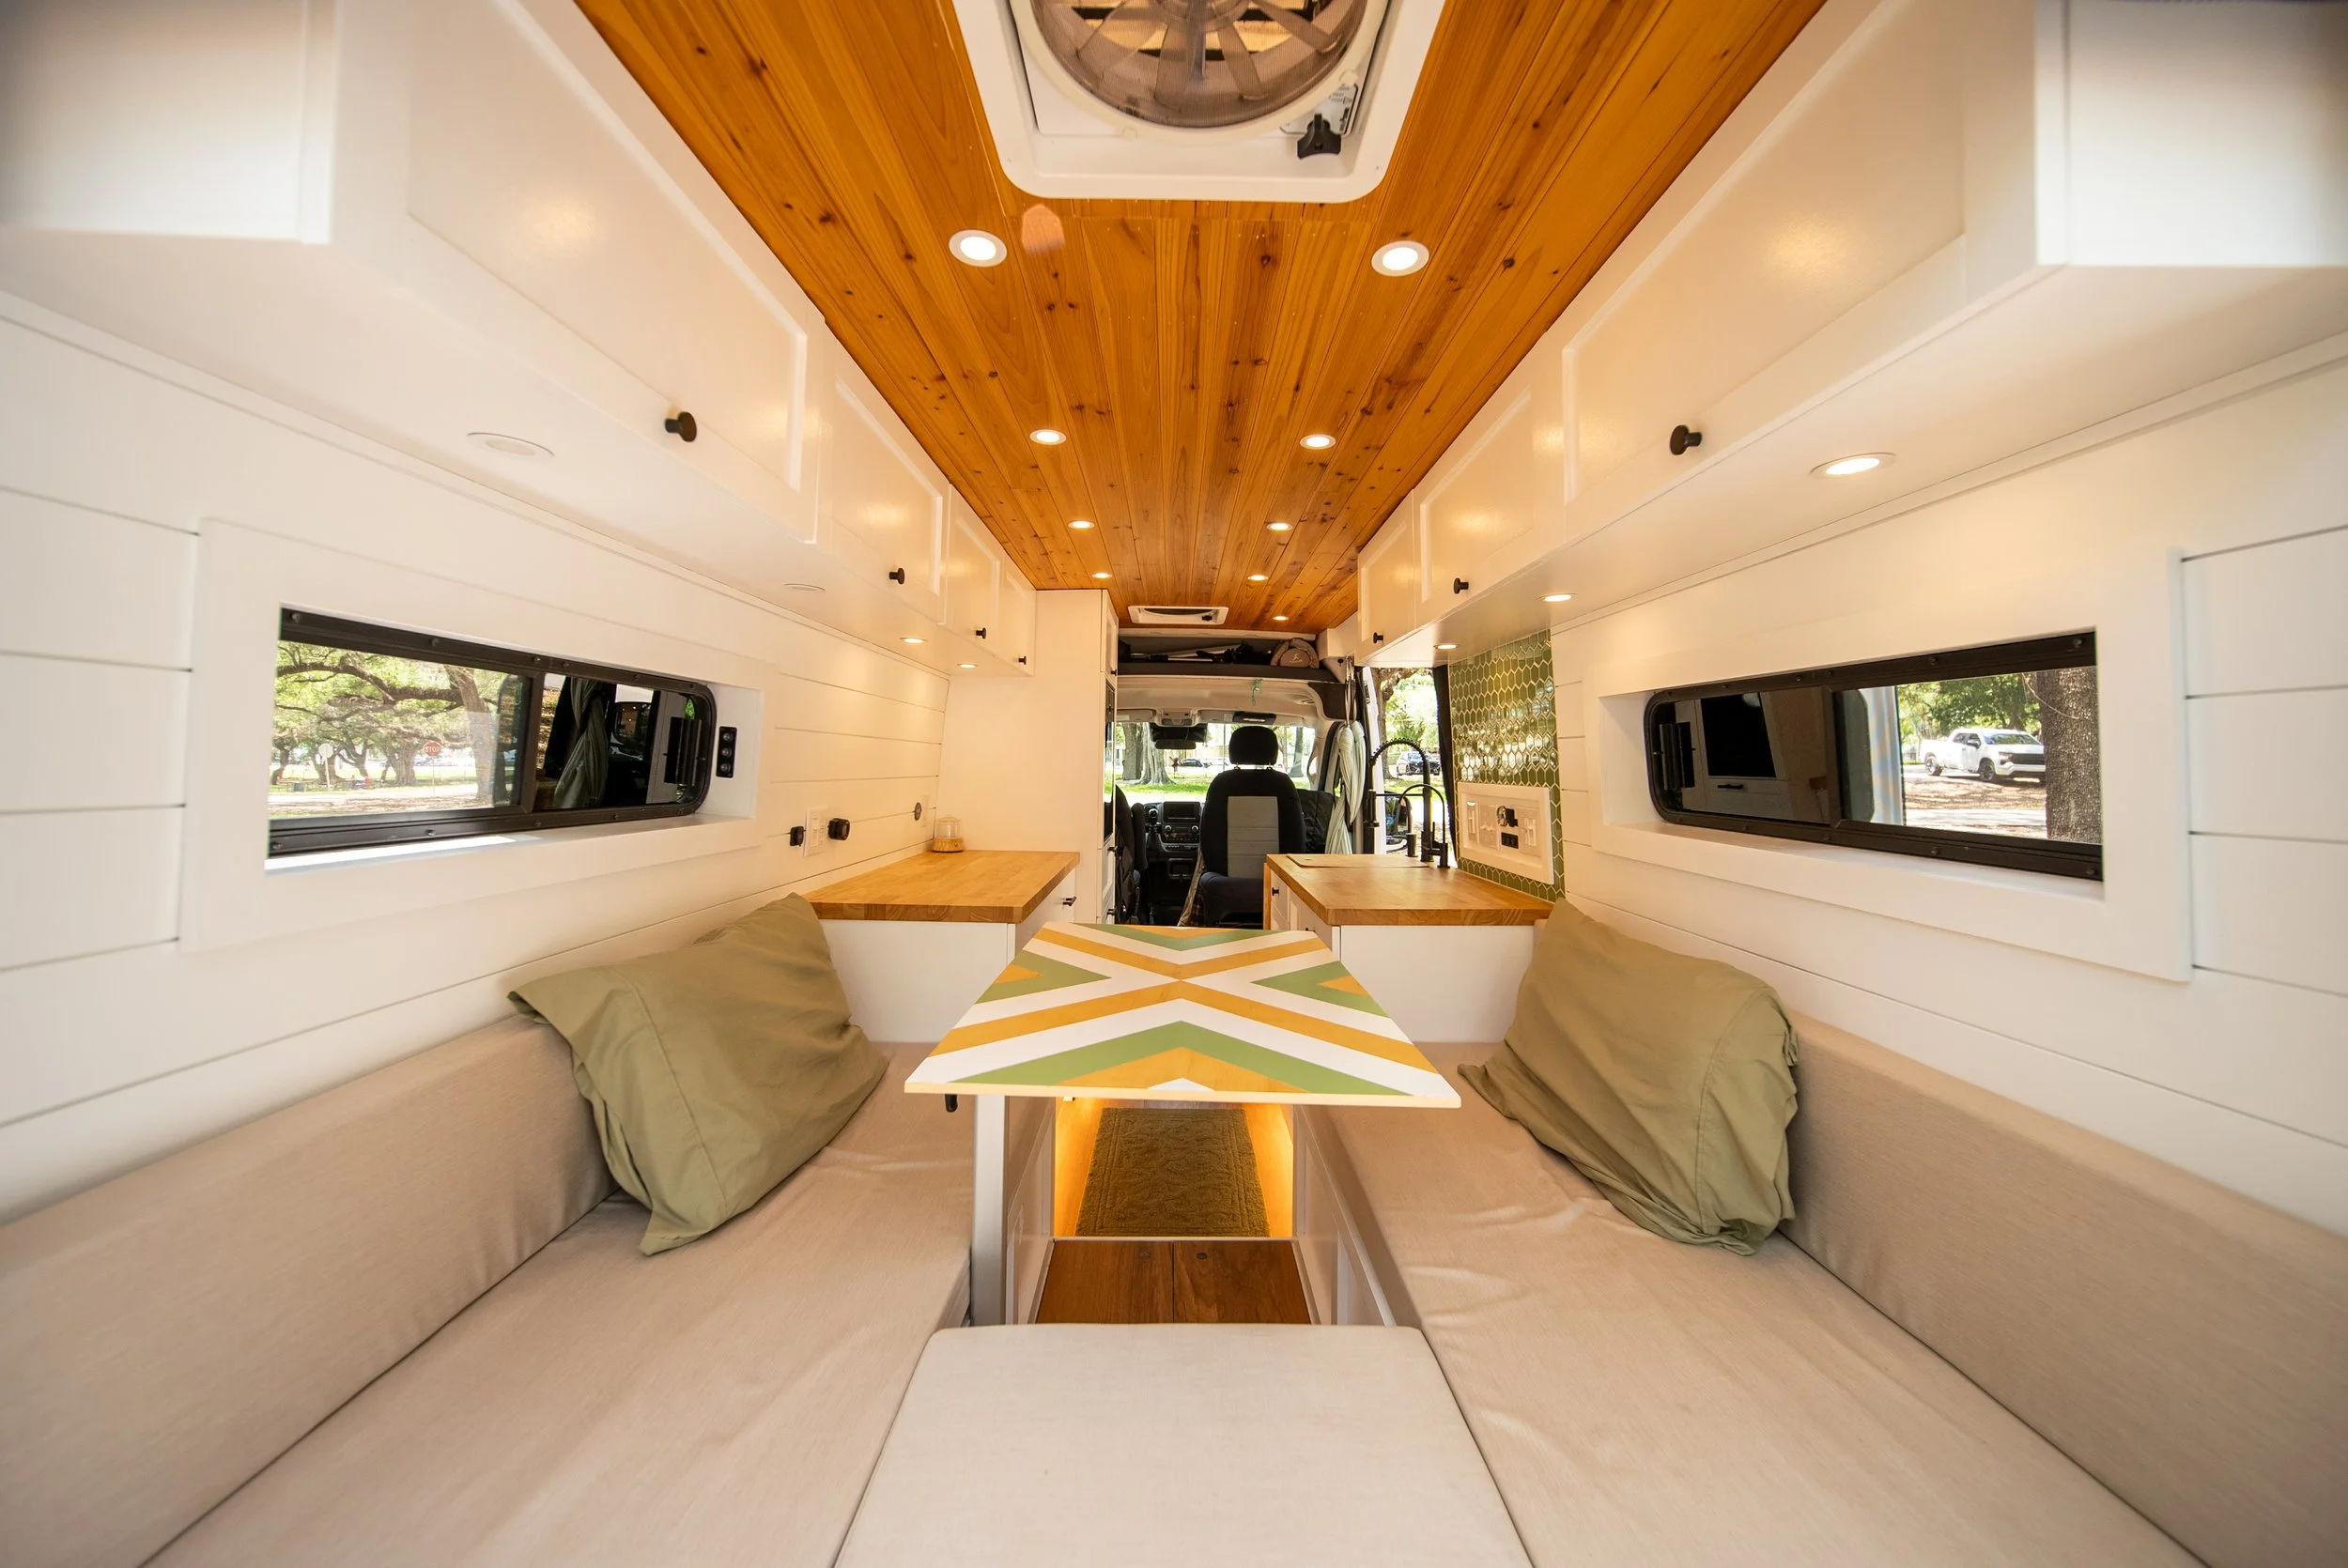
Nine ceiling lights arranged in two rows, with an additional light over the sliding door entrance and passenger swivel seat
Three lights installed under the passenger-side overhead cabinets
Four lights installed under the driver-side overhead cabinets
Under-cabinet lights are divided into zones so they can be controlled separately (kitchen light, two lights over the passenger bed, two over the dresser, and two over the driver-side bed)
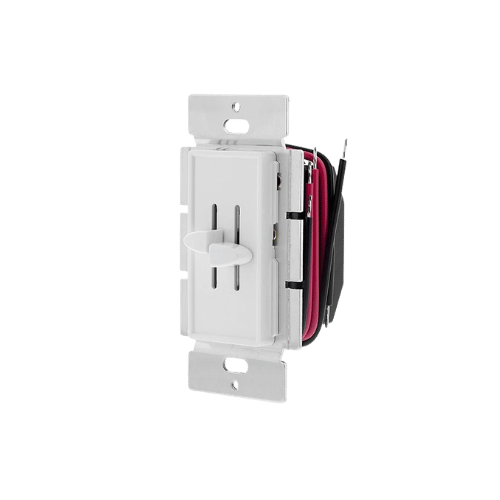
All lights are controlled by a 12 volt dual dimmer switch with a traditional home-style design
-
Dimmable lighting allows me to adjust brightness depending on the situation
Evenly distributes light and helps define different areas of the van
If one light stops working, the rest continue to function unlike a single LED strip system
-
Planning Your Lighting Layout
Physically walk around the van and imagine how you’ll live in the space to determine the number of lights and switches you need and where they should be placed
Consider cabinetry that will be installed against the ceiling and any rooftop components or van structures that may affect light placement
If installing both ceiling and overhead cabinet lights, plan their alignment so they visually line up for a cleaner look
Plan puck light spacing evenly across the ceiling for balanced lighting
I recommend installing two rows of ceiling lights instead of a single strip down the center for better light coverage
Personally, I wouldn’t install fewer than nine ceiling lights in a van this size
Install puck lights at the same time you install the ceiling and cabinets
Wiring
Wire the puck lights in parallel, not in series, so if one light fails the others continue to work
Wiring in parallel means all positive connections are tied together and all negative connections are tied together separately
Run wiring from the fuse panel → switch → puck lights
Run the wires from the switch around the top perimeter channel of the van to reach each light location
Leave extra wire length so lights can be pulled down for maintenance or replacement
Use 14-gauge wire, which is sufficient for these lights
Purchase wire in two separate colors and coils rather than sheathed cable to reduce weight and simplify connections
I used Wago lever nuts for connections, though tap splice connectors or butt connectors are alternative options
To stay organized, connect all negative wires first and then all positive wires
Make sure the switch used to control the lights is 12V compatible if using 12V puck lights
Installation
Use a 2 1/4" hole saw for these specific puck lights and be mindful of wiring behind the ceiling when drilling
Ensure the ceiling board is wider than the puck light body before drilling
The puck lights are spring-loaded, allowing them to sit flush and securely against the ceiling
-
Warm white lighting creates a cozy atmosphere, while cool white lighting can feel more sterile
Puck light bodies are available in different colors to match your interior
If you have a 12 volt battery system, use 12 volt lights so no inverter or voltage conversion is needed
Lighting circuits can be controlled by multiple switches if desired
I created separate lighting zones and used three dual dimmer switches instead of six individual switches to control them
-
LED Light Strips
Flexible LED strip lighting that can be installed in channels or recessed into ceilings, cabinetry, or trim for continuous lighting
Battery-Operated Lights
Small battery-powered lights controlled by a remote or push button
Easy to install since no wiring is required
Require battery replacement or recharging over time
-
One of my favorite things about my van is the lighting. I love being able to control the brightness and use different lighting circuits depending on what I’m doing.
Sometimes I want the entire van lit up with the ceiling lights. Other times I prefer a cozy, more stealth setup at night with just the toe kick lights. If I’m reading in bed, I can turn on only the lights above me. When cooking, I can use the kitchen lights, or when grabbing something from my dresser I can turn on just that section.
Having multiple lighting zones allows me to fully brighten the space when I want, or keep things low, cozy, and more stealthy with minimal lighting.
LED Light Strips
-
12 volt dimmable waterproof warm white LED light strips
Recessed in the toe kicks of the kitchen, dresser, and floor-to-ceiling cabinet
Controlled by a centrally located 12 volt dual dimmer switch in the kitchen control panel
-
The most practical solution for toe kick lighting
Creates soft ambient lighting at night while still providing enough brightness to illuminate the van when needed
-
If you have toe kick drawers, router a channel for the LED strip so it sits recessed and protected
Router the channel before installing the cabinets, otherwise you won’t have access later
If your cabinets don’t include toe kick drawers, recessing the strip may not be necessary
Position the LED strip closer to the front edge of the toe kick for the best lighting effect
When cutting LED strips, follow the scissor markings to ensure the strip continues to function and can be reconnected if needed
LED strips often come with a connector attached — you can cut it off to expose the two wires for wiring
I used LED strip connectors to reconnect the lighting strip between my dresser and floor-to-ceiling unit since those cabinets are different depths
-
Recessing the light strip helps protect it and creates a cleaner, more finished look
LED light strips are also available in different colors such as red, blue, green, and purple, and can often be controlled with a remote if that’s your style
-
This is my favorite lighting circuit and the one I use the most. It creates a cozy aesthetic at night while still providing plenty of light when needed. I actually use these lights more often than my ceiling lights.

Related Resources
Watch the Tutorial

Shop Product Links


As an Amazon Associate, Lauren will receive a small commission from any qualifying purchases made through these links, at no additional cost to you.Thank you for your support!Want the full step-by-step instructions?
Download the detailed installation guide that walks through this project from start to finish.

Ready to build with confidence?
Follow step-by-step installation guides that break down the most complex parts of the build into clear, manageable steps.
Need help planning your build?
Book a 1:1 Consultation