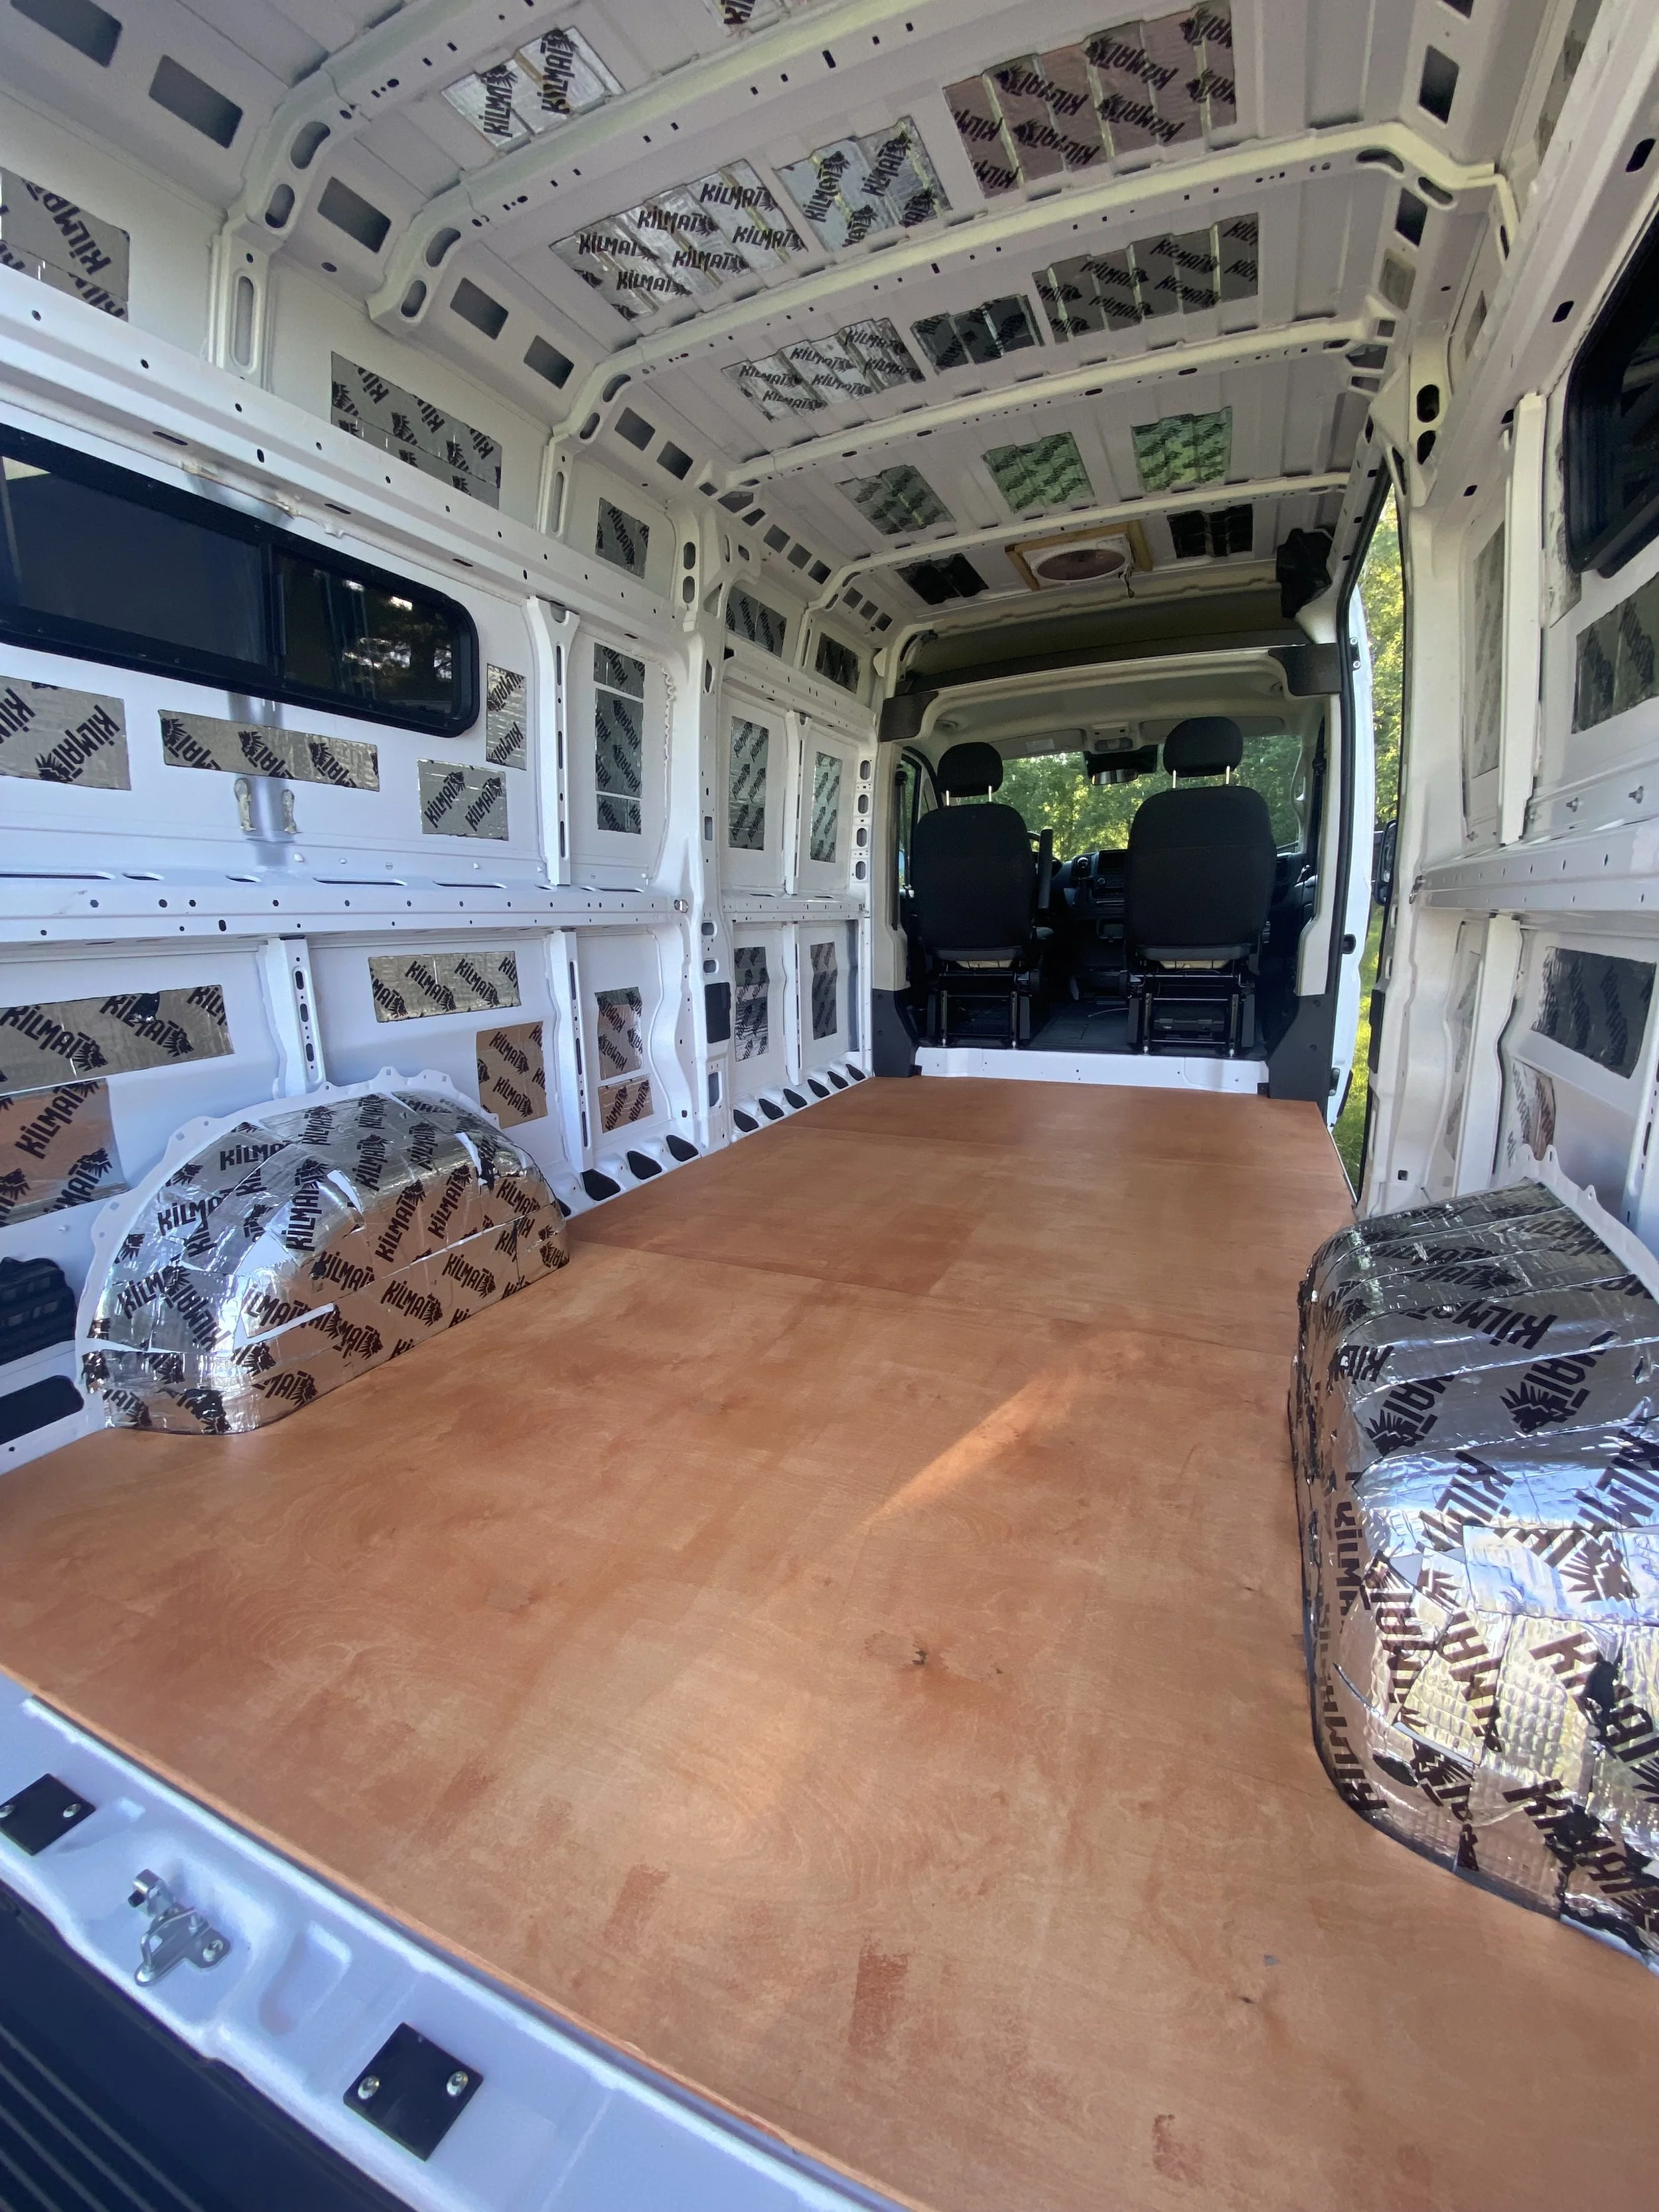
Subfloor
-
1/2” Baltic Birch plywood with Thompson’s Water Seal
*No insulation material
*Didn’t fasten the subfloor down
-
Create a solid foundation for the rest of the build
Provide a secure surface to fasten cabinetry and other components directly to the van
-
If your van did not come with a factory floor mat, create a cardboard template and use it to trace the floor shape onto plywood
Leave a 1/4" gap around the perimeter of the subfloor to allow for expansion and contraction
Watch the install video below to see the stencil method I used to create the floor template.
-
I used 1/2" plywood to save as much interior headroom as possible
I chose not to insulate the floor. Since heat rises, the floor will likely feel cool regardless, and skipping insulation helps save weight, time, money, and interior height
If the floor feels cold, simple solutions include adding a heated floor pad or radiant heating, using a small rug, or wearing socks or slippers
I’ve been in vans with insulated floors and the floor is still cold
The subfloor does not need to be fastened to the van. Once cabinetry and other interior components are installed, they hold the subfloor in place
Orient subfloor seams side-to-side rather than front-to-back to avoid seam placement in high-use areas like the galley
Avoid filling the channels between the van floor ribs, as they help allow airflow under the floor and prevent moisture from becoming trapped
Install the subfloor before adding furring strips, since the framing can lock it in place and limit the space needed to install it properly
-
I would install my subfloor the same way again — using 1/2" plywood, running the seams side to side, leaving a 1/4" perimeter gap, and skipping insulation.
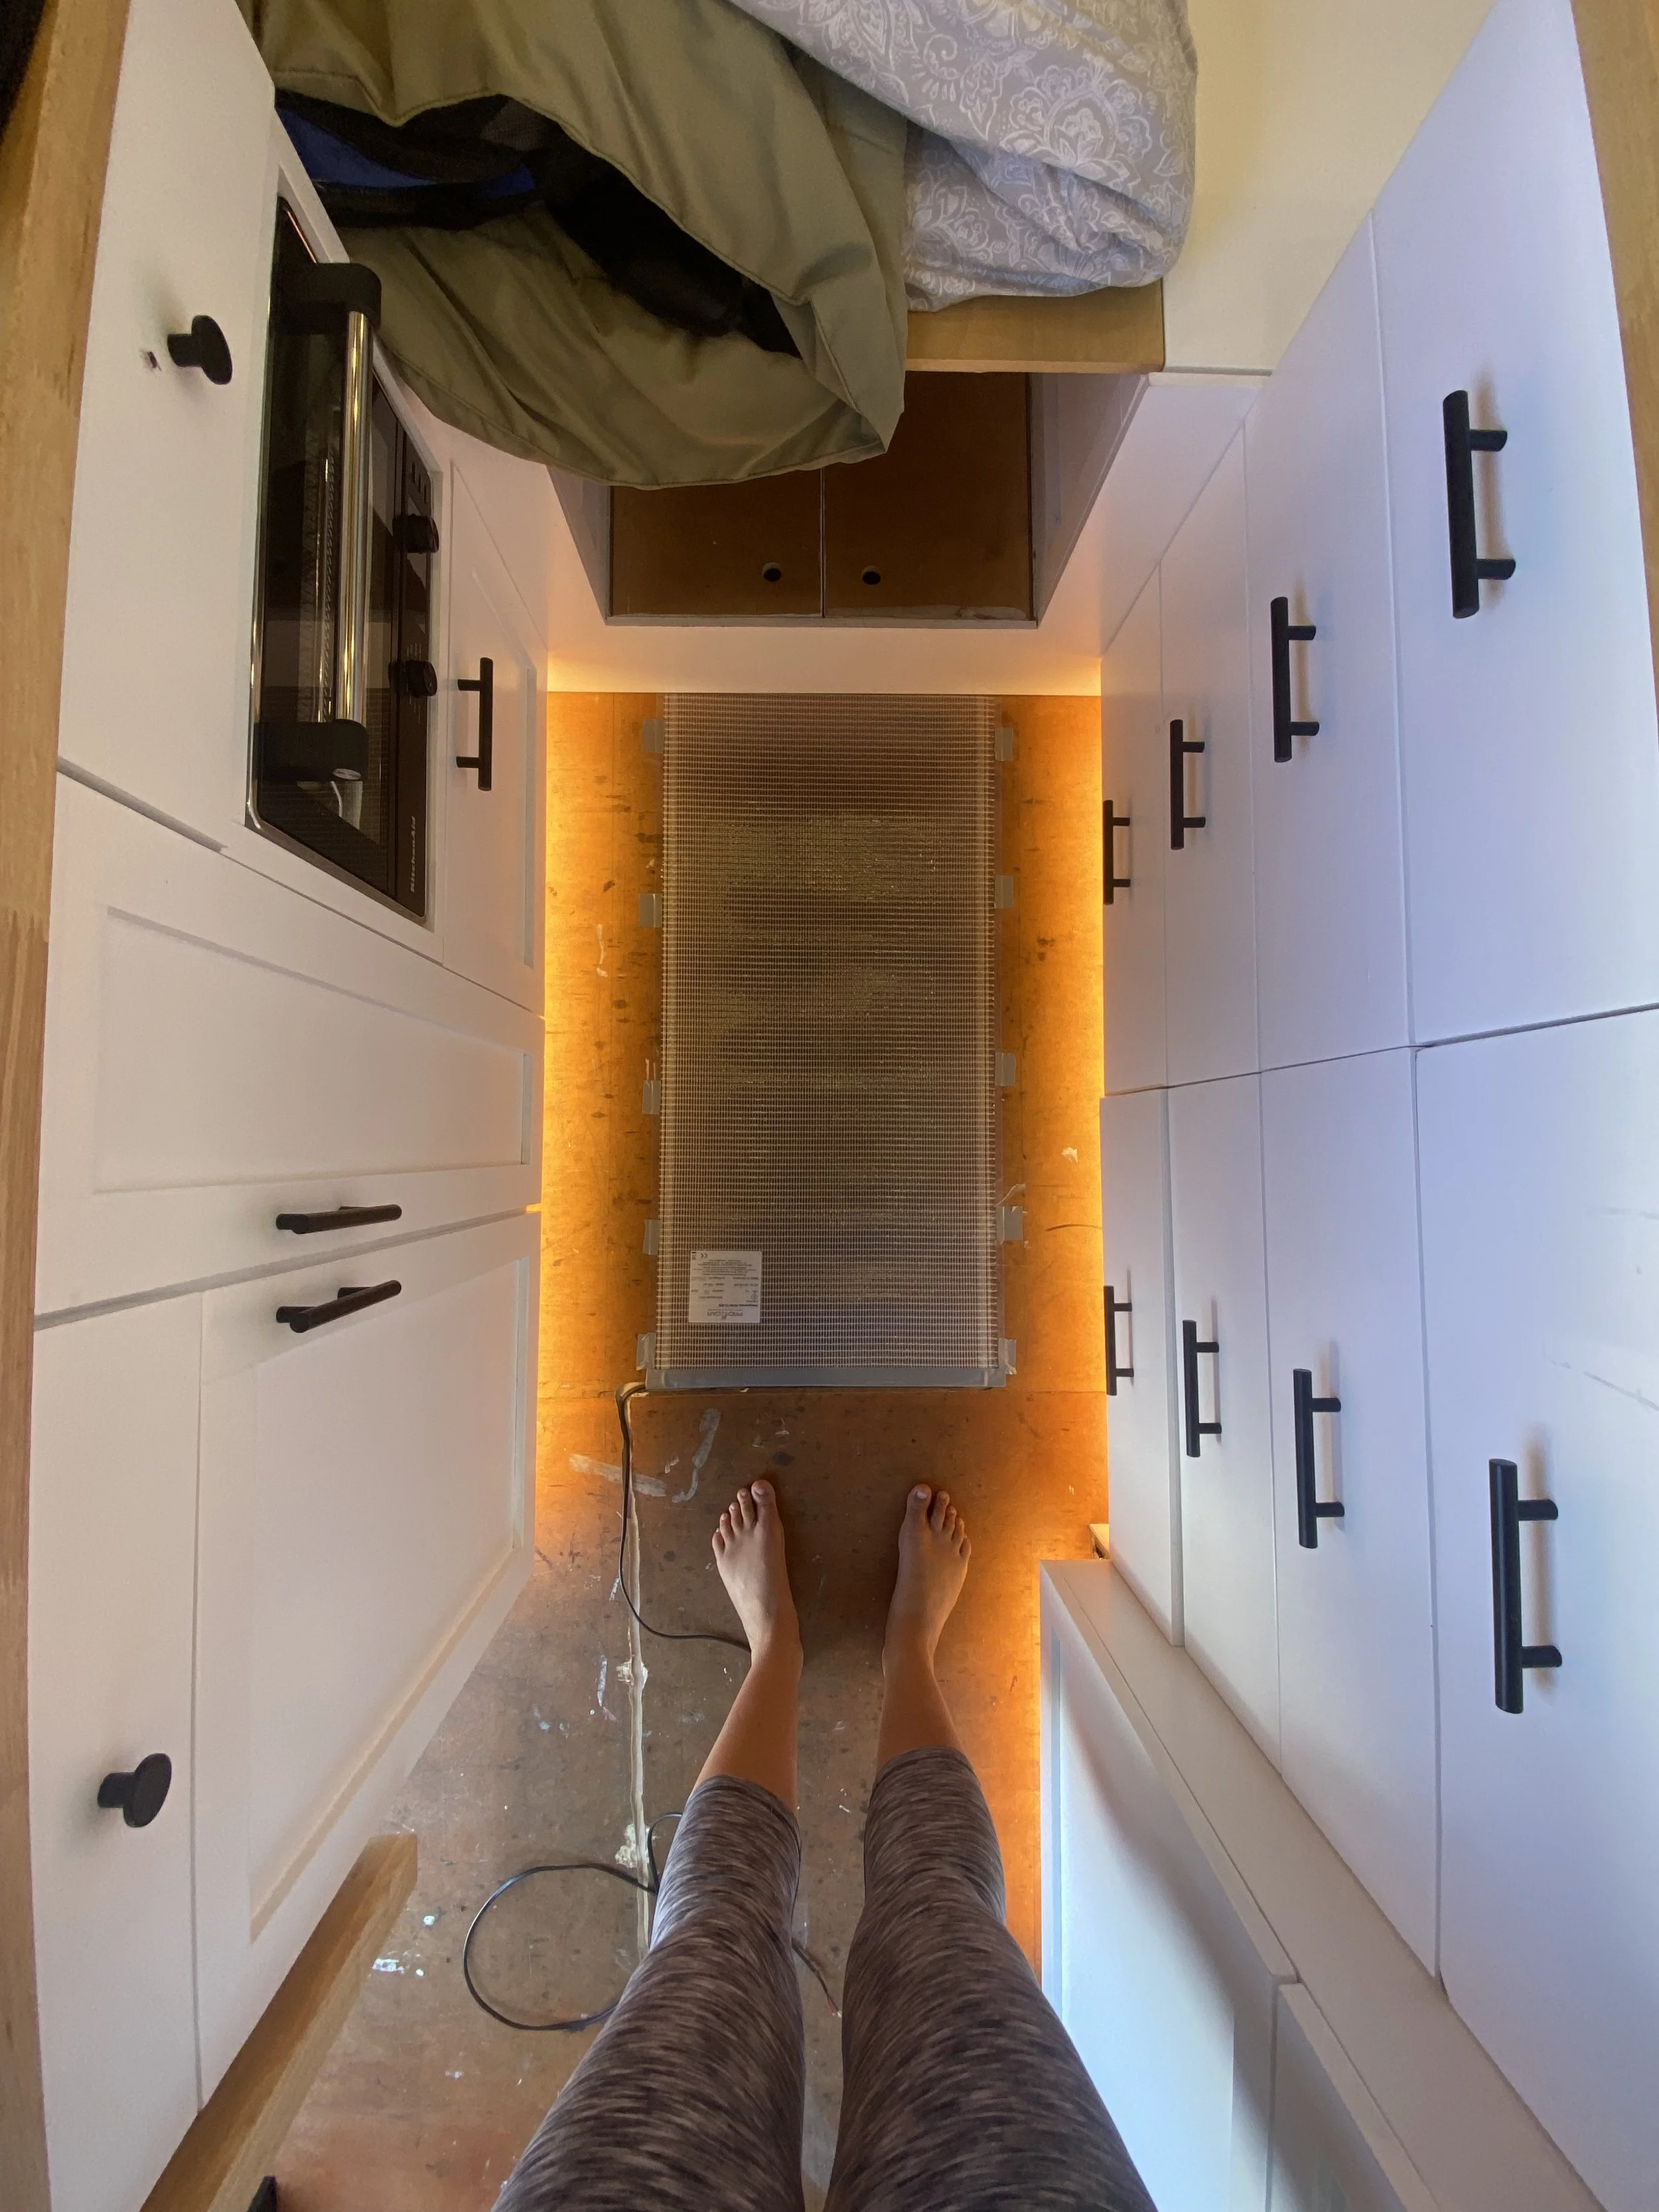
Heating Mat
-
12 volt heating pad from Expedition Upfitter
Installed on top of the subfloor and beneath the finished flooring
Paper-thin profile with virtually no added floor height
-
Help keep the floor warm while traveling in colder climates
-
A 12 volt heating pad is more efficient when paired with a 12 volt battery bank because no power conversion is required
These specific mats should not be daisy chained
The mats can be cut to length, but not to width
Router a small channel in the subfloor for the wiring to sit flush beneath the flooring
I made the electrical connection above the floor in the step-up area so it can be accessed later if needed
-
This heating pad does more to keep the floor warm than insulating the subfloor alone
Make sure the materials above and below the heating pad are safe to have a heat source in direct contact
Plan the mat placement in high-traffic areas where you will actually feel the warmth
I installed mine between the kitchen and dresser where I stand most often, rather than near the sliding door entrance
Wire the heating pad with an on/off switch. I installed mine in the frame of my driver-side bunk window near the bed so it’s easy to turn on before getting out of bed on cold mornings
-
Radiant Heated Floors
Uses hot water circulating through tubing installed in the subfloor
Provides consistent radiant heat across the floor but requires a more complex plumbing and heating system
Simple Solutions
• Add a rug or wear socks or slippers to keep your feet warm
-
Although I don’t use it often, I love having it when I do. It uses little power and keeps the floor toasty. Unlike insulation, which only helps keep cold air out, this actually warms the floor.
Final Floor
-
Luxury vinyl plank flooring (floating floor)
Floor nosing installed at the sliding door entrance
Total floor thickness under 3/4", intentionally kept thin to preserve interior headroom
-
No glue required for installation
Strong interlocking connection that creates a water-resistant surface
Scratch resistant and durable
Available in many colors and design options
-
Install the flooring after cabinetry instead of underneath it to save material, weight, and cost
Leave a 1/4" gap around the entire perimeter to allow for expansion
Use quarter-round molding and brad nails to cover the expansion gaps
Stagger the end joints of each plank to create a stronger locking floor
Start installing in the furthest interior area and work toward the sliding door
Continued the flooring onto the lower bed box and step-up behind the cab for a seamless, cohesive look
I secured the planks on the bed and step-up lids with brad nails and have not experienced any issues
-
Heavy material
-
Installing the flooring after cabinetry allows the floating floor to expand and contract with climate changes and makes it easier to replace damaged planks or update the flooring in the future
Install the flooring near the end of your build to avoid spills or damage during the build process
-
Vinyl Sheet Flooring
Vinyl sheet flooring is a glue-down option installed as one continuous piece
I would generally avoid vinyl sheet flooring for van builds
It can be prone to tearing, fading from sunlight, and bubbling in warmer climates
Installation requires a completely flat, smooth, and clean subfloor
Installing around cabinetry can be difficult, so if using this option it’s best installed before cabinetry
BedRug / VanRug Carpet Flooring
Custom-sized carpet flooring designed specifically for vans
Installed before cabinetry
Can trap moisture underneath if not installed correctly
Does not feel like traditional home carpeting
Can trap dirt, be harder to clean, and may wear down with heavy foot traffic
-
I love my floor and it has held up extremely well over time. I would install it the same way again. It adds a nice aesthetic to the van while being durable and practical. I would recommend luxury vinyl plank over the other flooring options time and time again.
Step-Up
-
Step-up behind the driver and passenger seats
Built with 1/2" Baltic birch plywood
Removable lids with the luxury vinyl planks continued on top for a seamless look
-
Cover the van’s metal step between the cab and cargo area
Provide a comfortable place to rest my feet when sitting in the passenger swivel seat
Create a convenient location for outlets and charging ports (120V outlet, 12V socket, USB, and USB-C) accessible from outside the sliding door or sitting in the passenger seat
Conceal the heater and allow space to route the heater vent to face the back of the van
Add additional storage space
Create a more finished and cohesive transition between the cab and living space
-
Built the step-up with three separate sections to create a solid structure while each of their own purposes
The structure consists of a front board and perpendicular support boards for strength — no back or bottom
Secured the structure directly into the subfloor using pocket hole screws
Drilled holes in the interior boards to allow wiring and heater hoses to pass through
Added ventilation holes around the heater area and left the back portion open to allow airflow
Installed the step-up before installing the final flooring so the floating floor can expand and contract properly
Continued the final flooring onto the step-up lids for a cohesive look
Added corner guard trim to the edges of the lids for a clean finish and to help hold the lids in place
Installed “stoppers” on the underside of the lids to prevent them from shifting
Added automotive carpet to the van’s metal step and subfloor using 3M 77 spray adhesive for a clean finish inside the step-up
Designed the step-up to align evenly with the van’s factory step for a smooth transition
Installed quarter-round molding with brad nails around the base to cover the flooring expansion gap
-
I’ve seen people add hinges to step-up lids, but I prefer fully removable lids since they provide easier access and maximize usable storage space.
-
I’m really proud of how the step-up turned out. It’s incredibly functional, sturdy, and creates a clean, finished look in the van. I wouldn’t change anything about the way I built it.

Related Resources
Watch the Tutorial

Shop Product Links


As an Amazon Associate, Lauren will receive a small commission from any qualifying purchases made through these links, at no additional cost to you.Thank you for your support!Ready to build with confidence?
Follow step-by-step installation guides that break down the most complex parts of the build into clear, manageable steps.
Need help planning your build?
Book a 1:1 Consultation